Late in 2020 AMD launched the new Ryzen 5000 series parts along with the new Radeon 6000 series GPUs. I’ve never been entirely happy with the performance of the Radeon RX580 I had in my original PC I built back in May 2020 so I definitely wanted to upgrade things, this is a tale of how I ended up with a new PC in the same fashion as Trigger’s Broom.
Getting the GPU
I’ve been keeping my eye open for a MSI graphics card as the mother board I’ve been using is an MSI one and not having to install another manufacturers set of “management” software for LEDs and fans seemed like a good idea. I’d already decided on getting a Radeon 6800XT and while browsing the ebuyer website I saw there was a buy now button on the card on the Radeon 6800XT page for a Radeon RX 6800 XT GAMING X TRIO 16G, interestingly if you drilled down from the multiple cards page into the individual card there wasn’t a buy now button.
So the “buy now” button was clicked, credit card details entered and then a somewhat nervous wait happened as I waited to see if the card actually was in stock and was going to arrive in my hands.
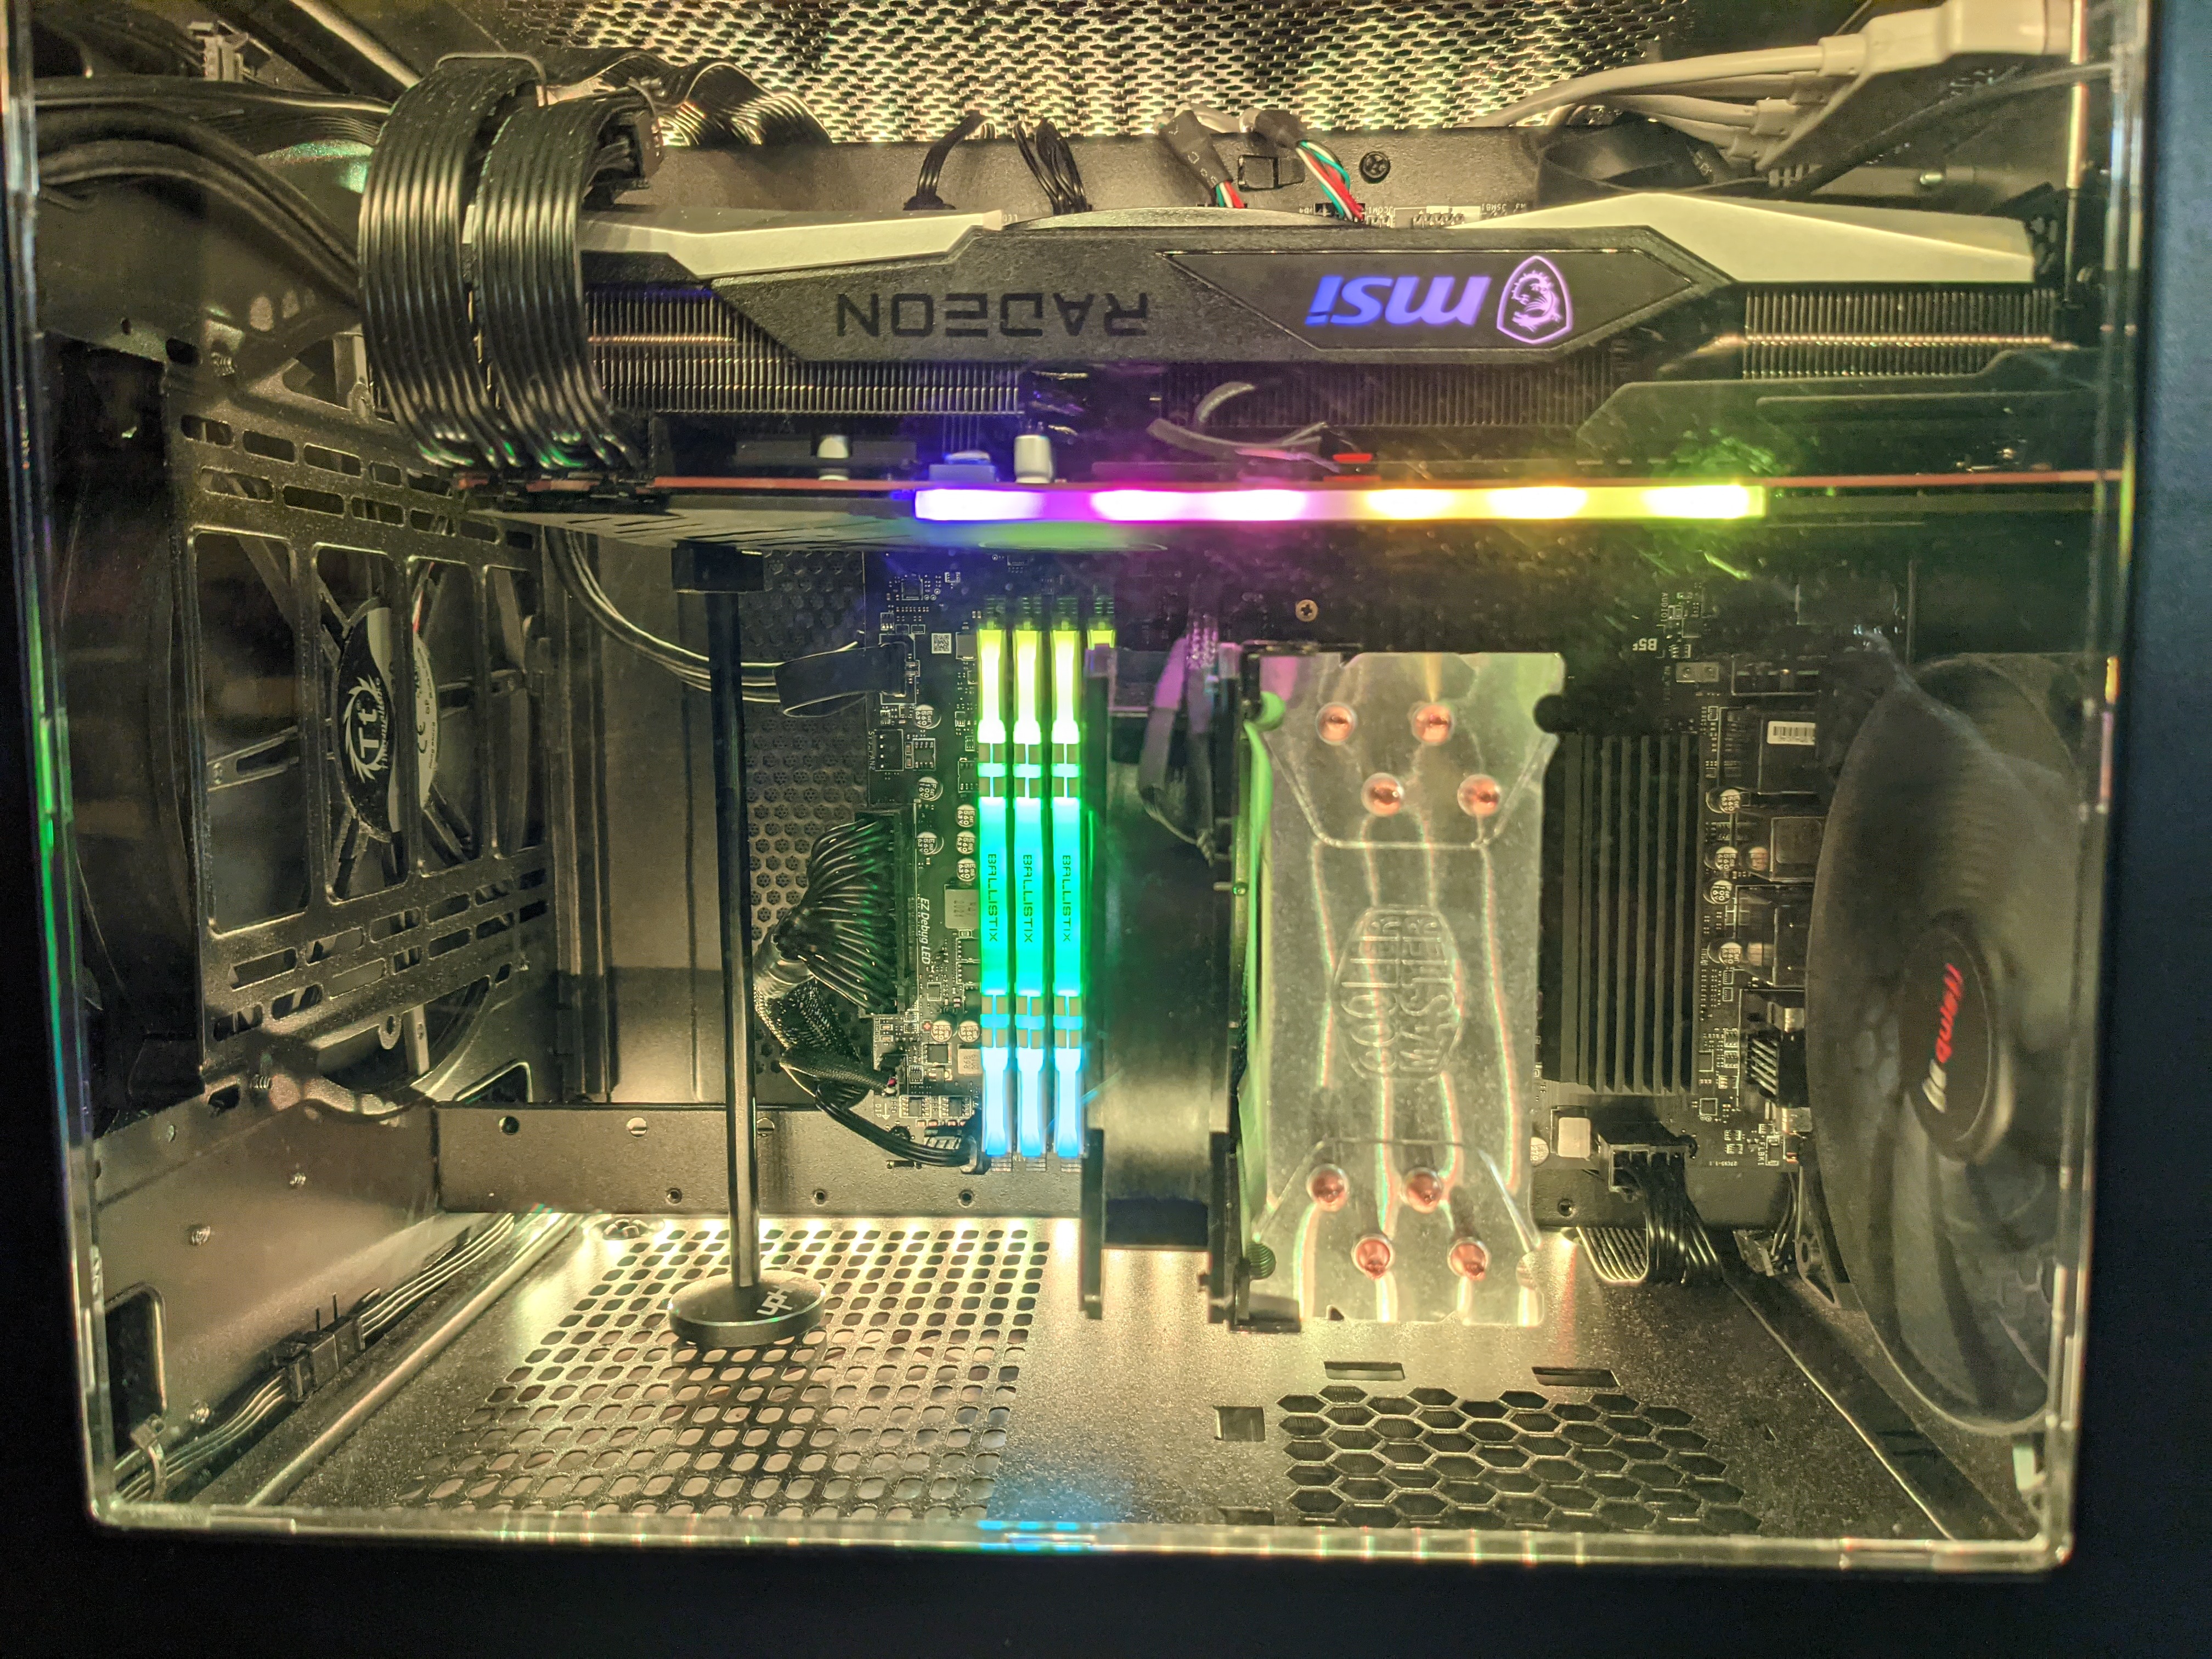
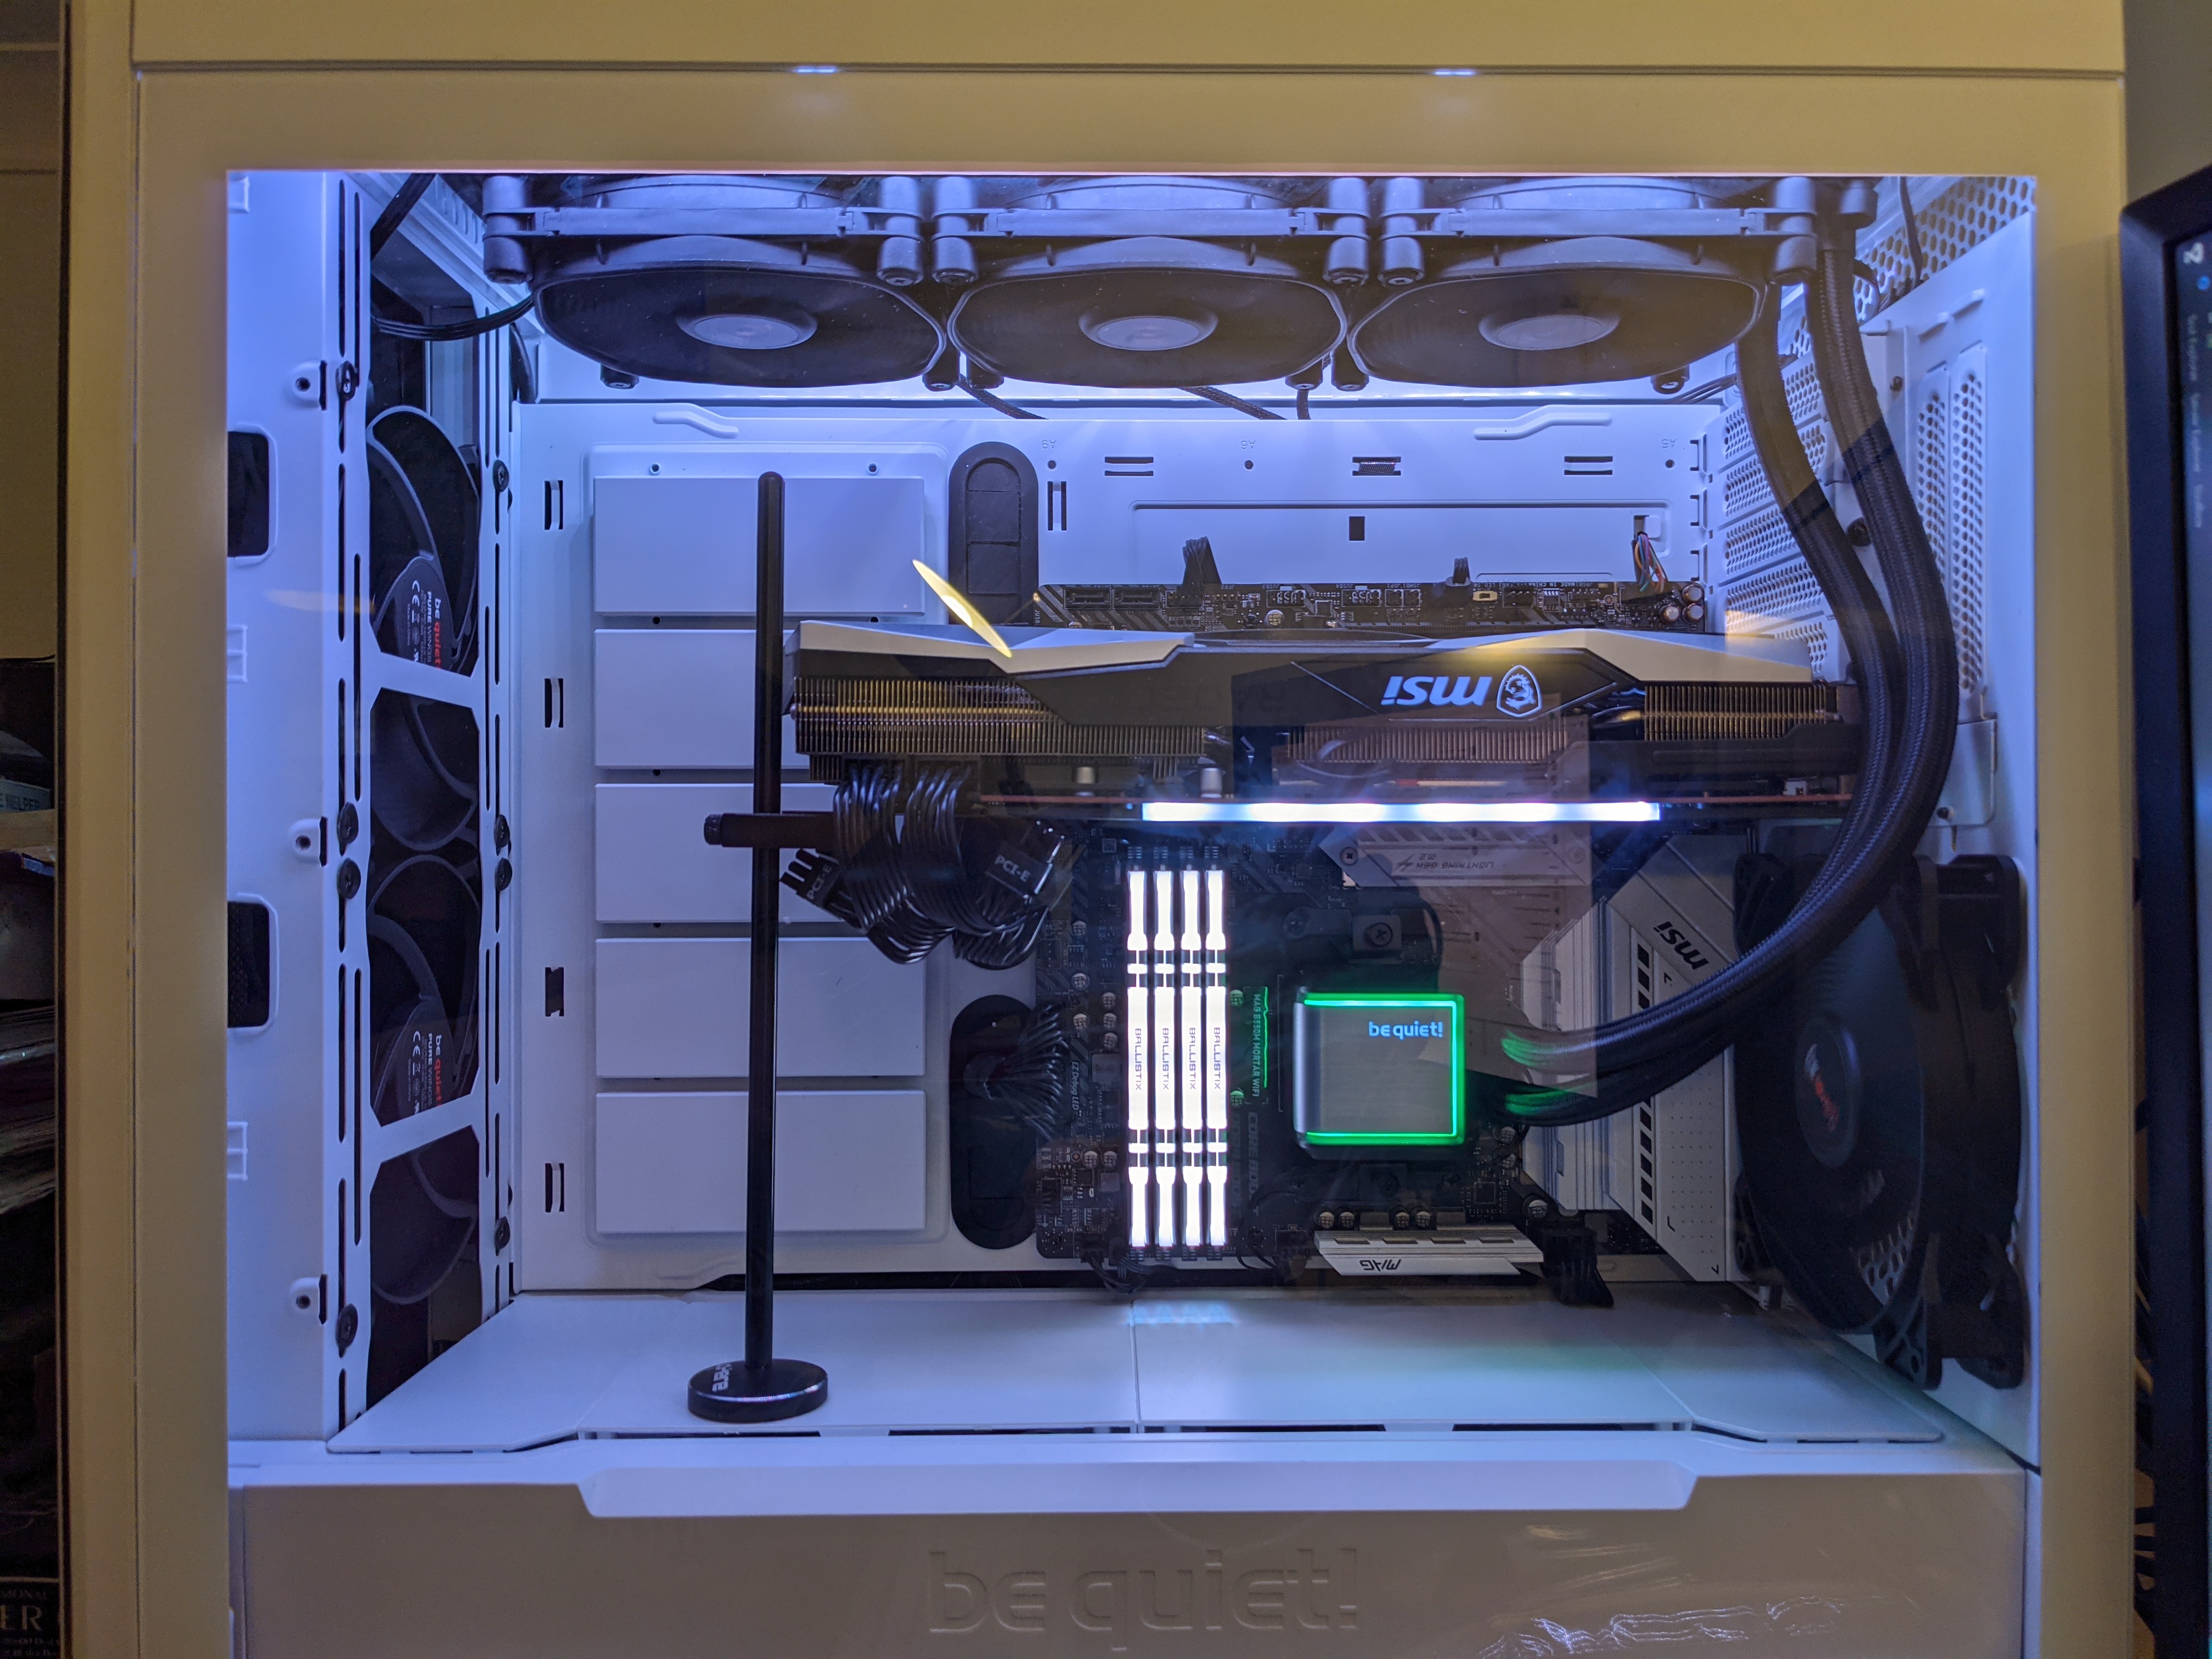
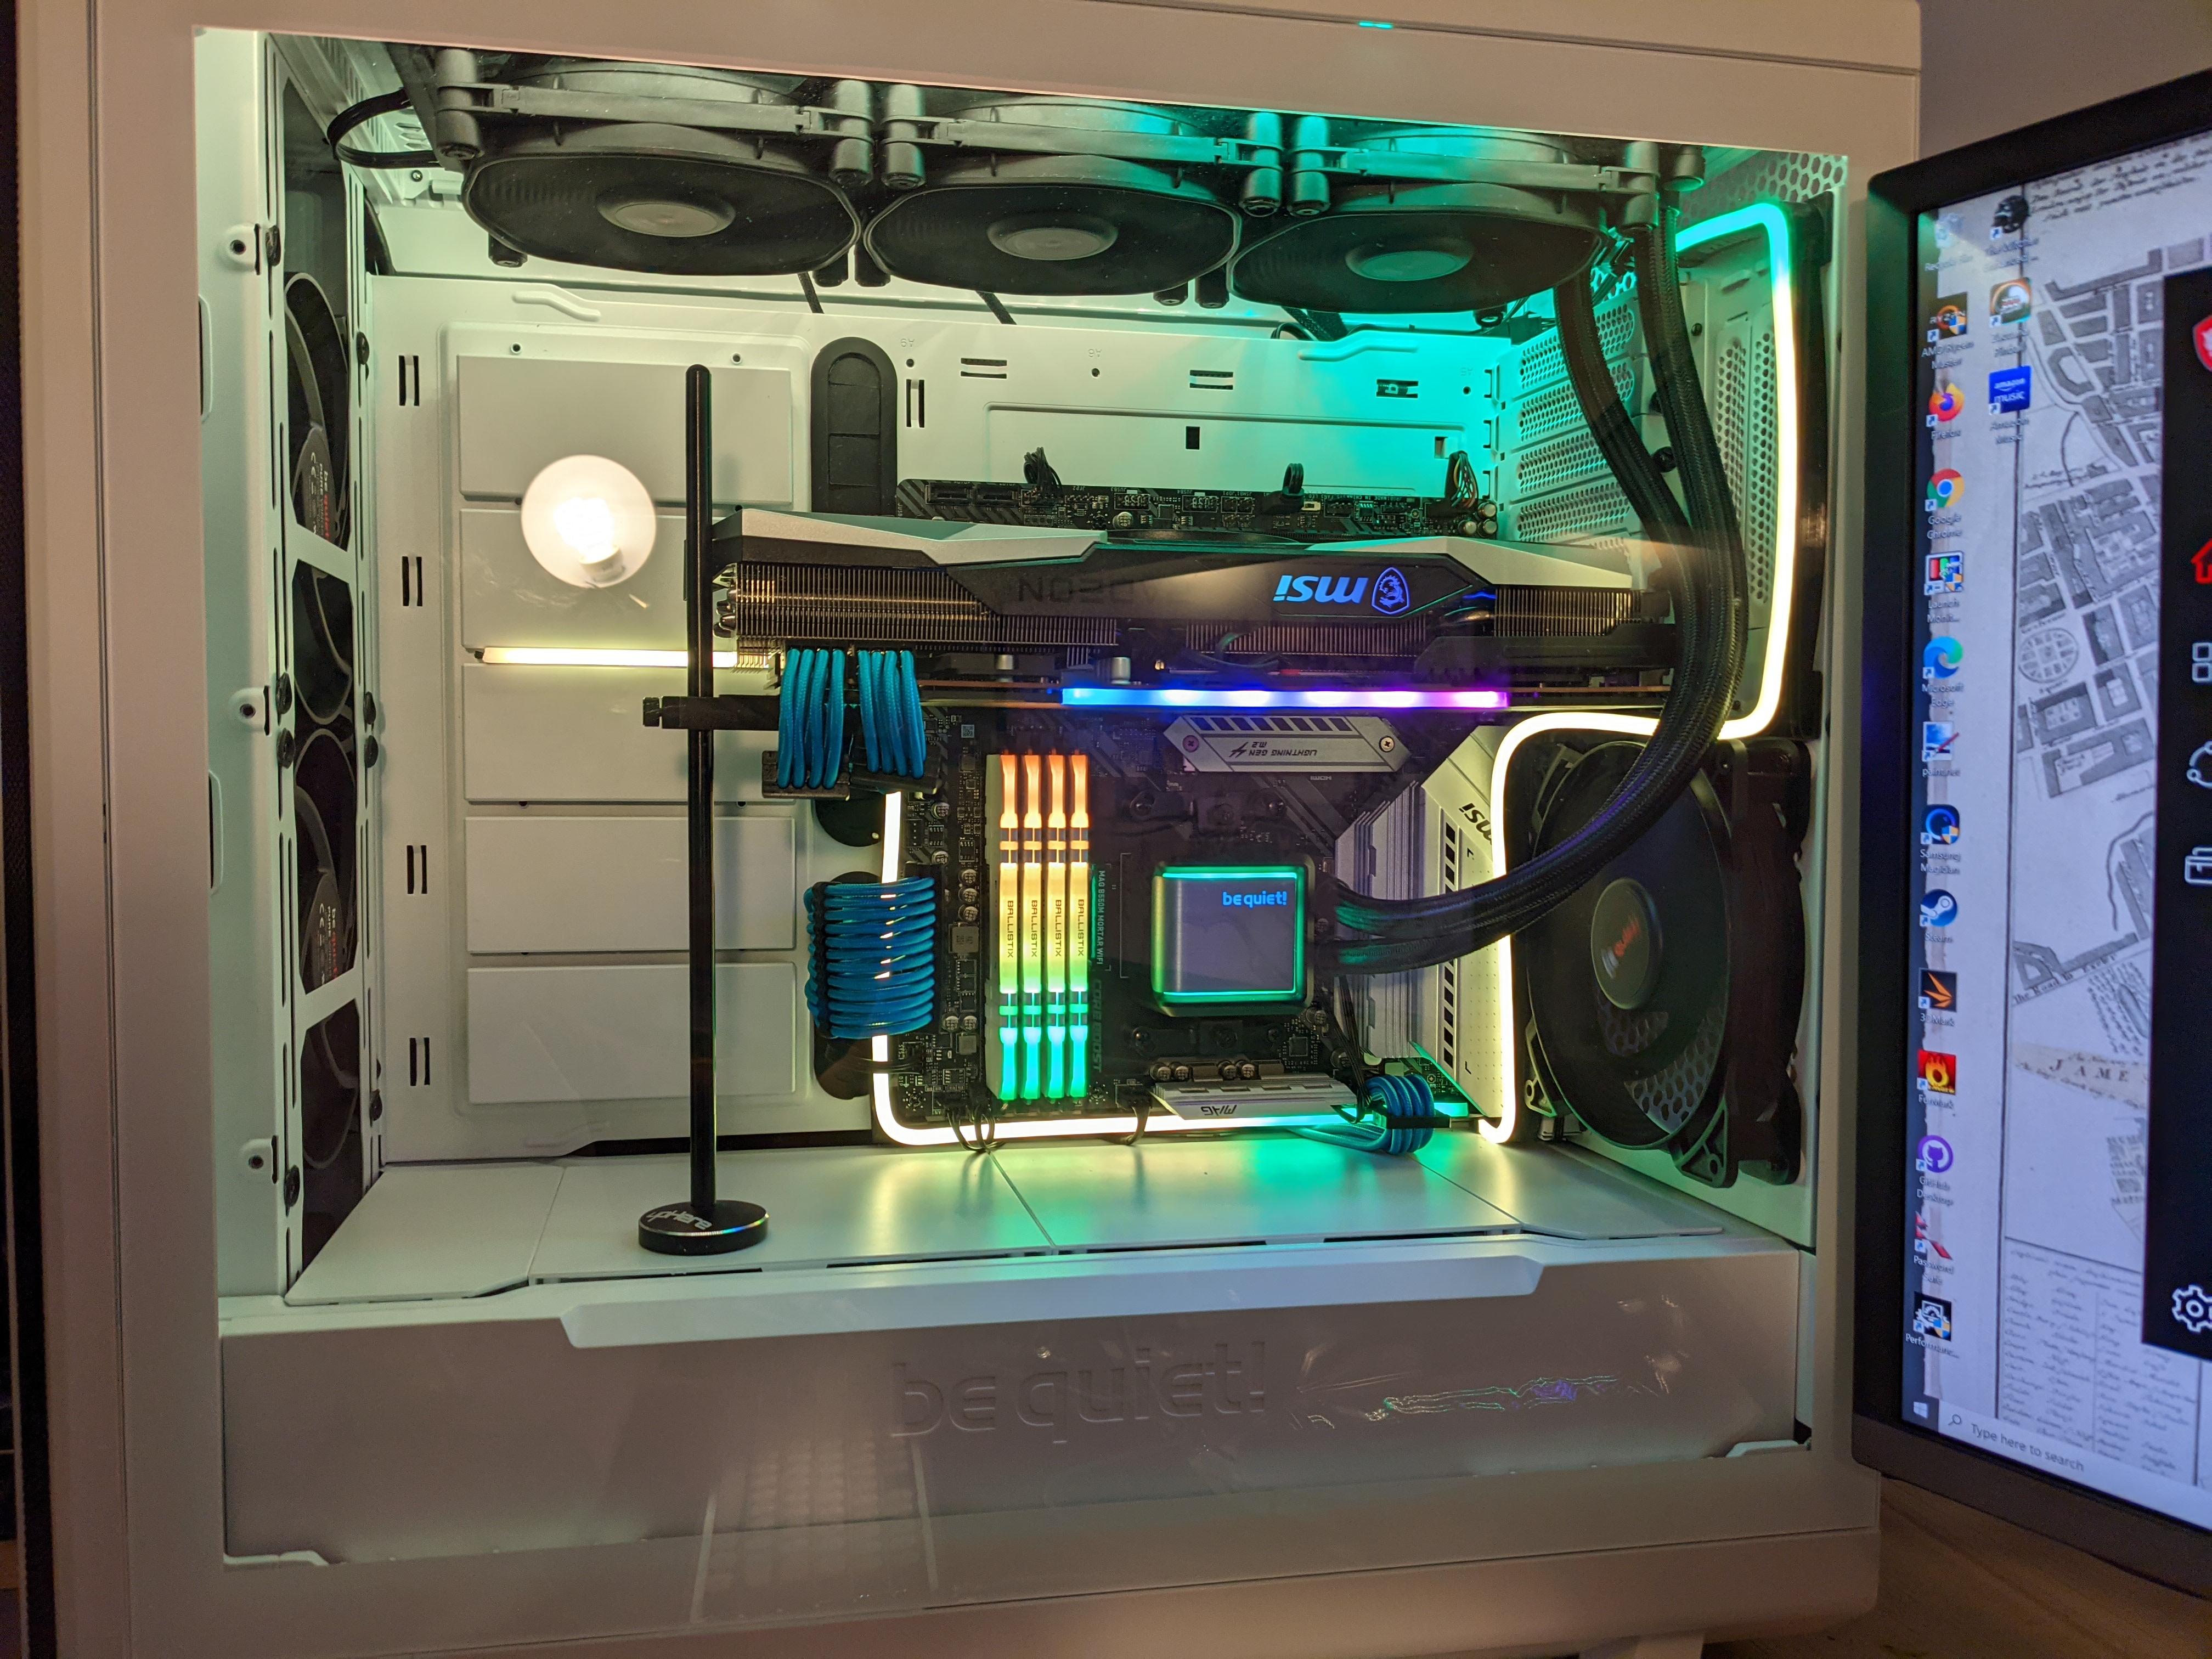
Graphics card in case with stand
This graphics card is heavy and comes with a brace for a regular PC case, but my case is rotated so the windows is on the other side and means the motherboard is inverted. I tried it briefly without a brace but ended up buying this upHere Graphics card GPU brace which is a little pole which stops the card sagging.
I think I was mildly “scalped” on pricing by ebuyer but then there is a shortage currently.
Getting a CPU
Next up was getting a new Ryzen 5000 series CPU. I had originally planned to get a Ryzen 5900X 12 core part but availability seemed to be awful, and eventually there was delivery of the more expensive 5950X part which seemed to stick around a bit.
An order was placed and a Noctua DH-15 cpu cooler was added to the mix along with a Samsung 980 Pro 1Tb SSD drive as fitting a new CPU and cooler meant the whole case was being taken apart and I fancied the speed improvement of the new Samsung SSD PCIe 4.0 interface.
Installing the CPU
Problems
Problem #1 space in the case
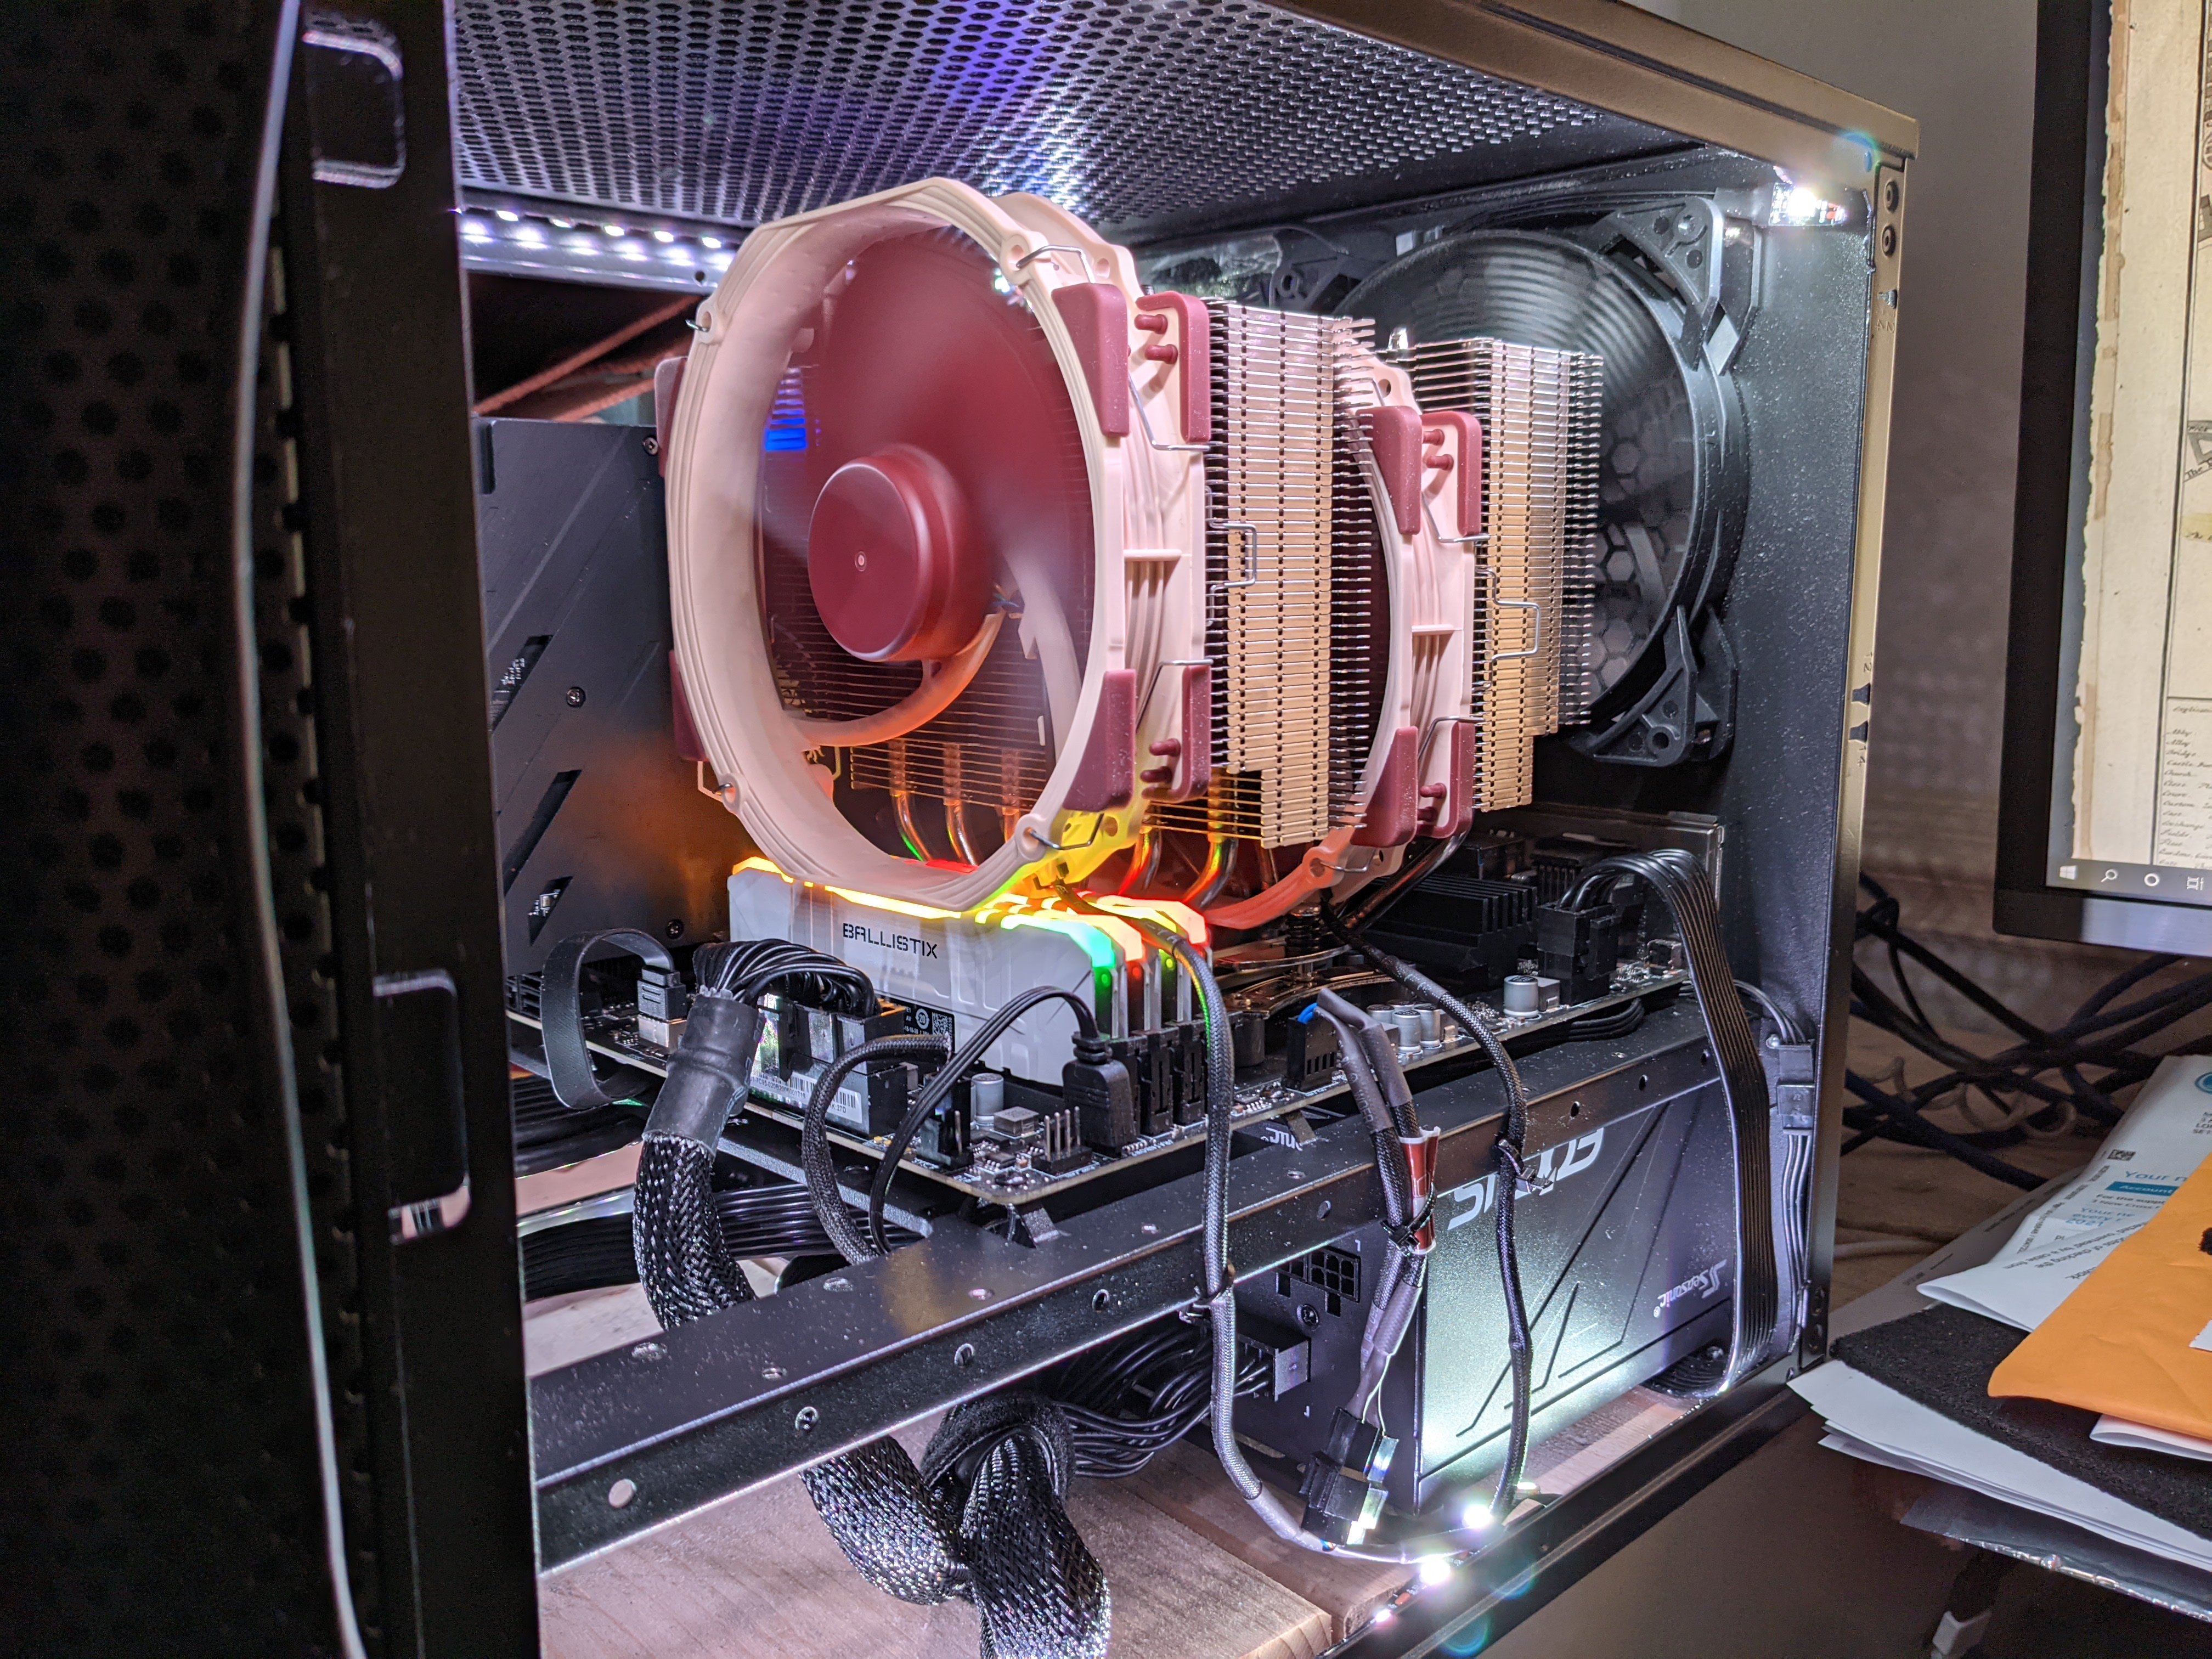
Once installed the case was buttoned up and the final result looked like this:
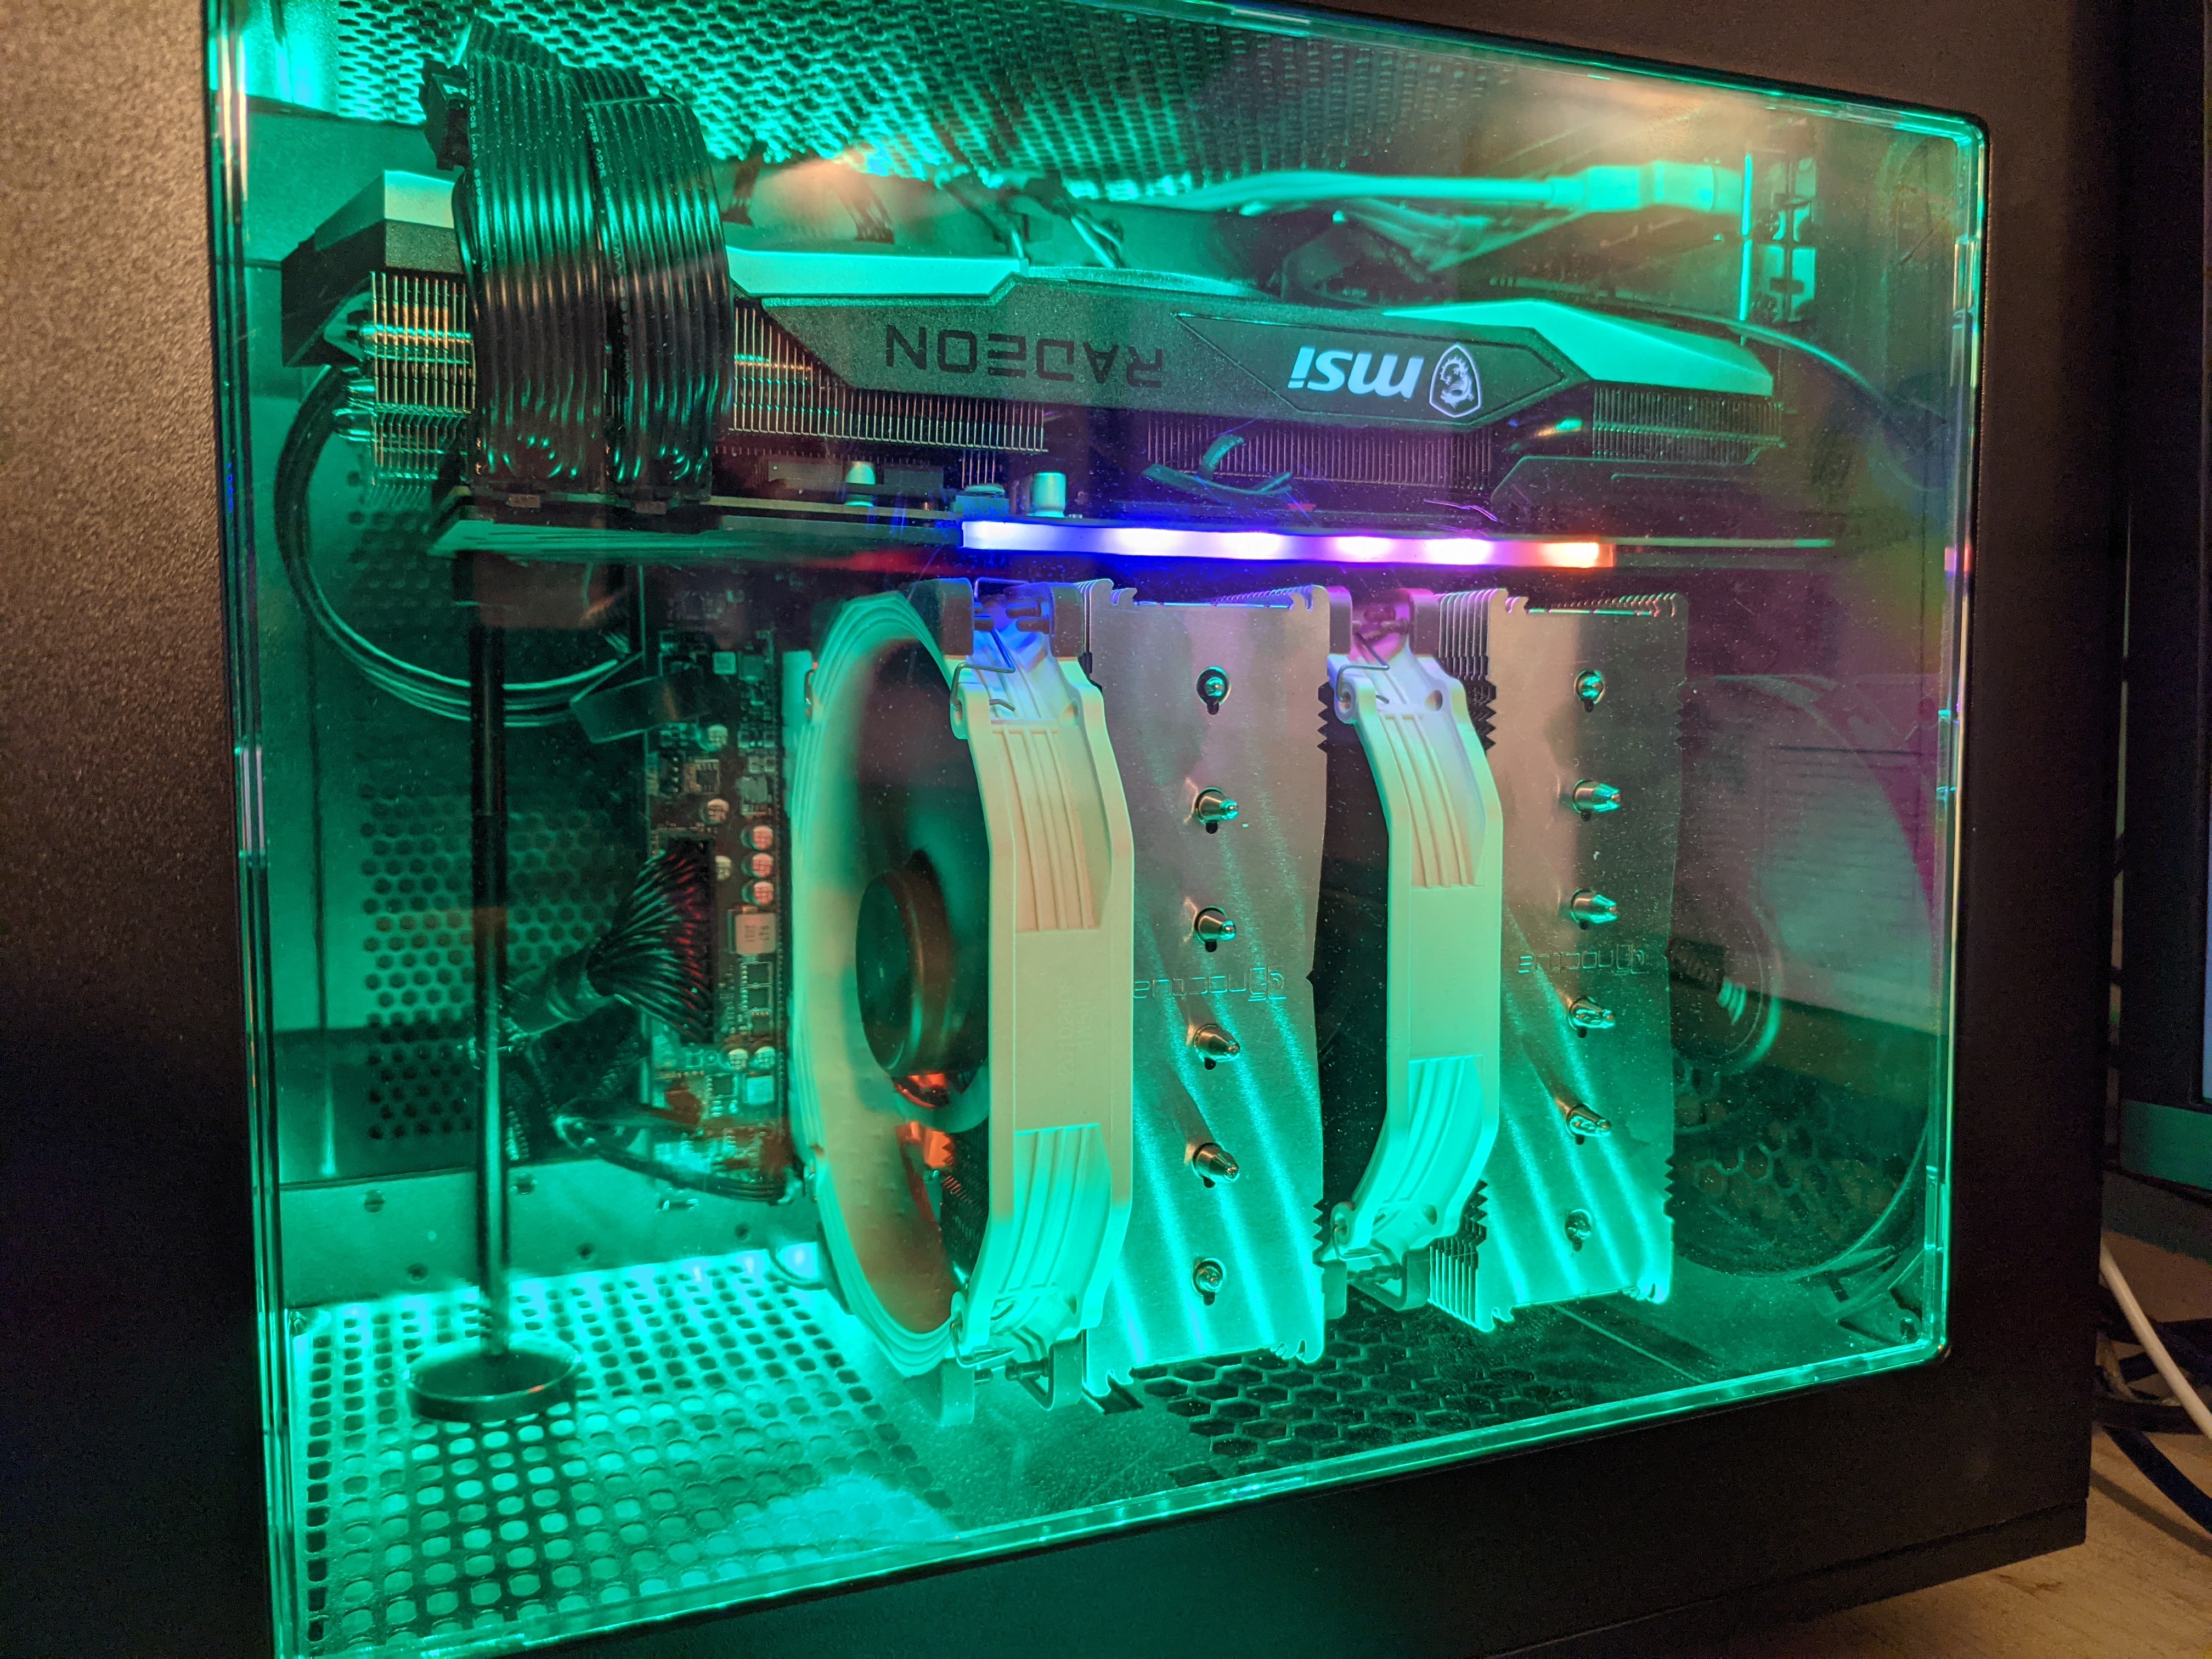
Very full case
This case is looking a bit busy to be honest and when I ran some performance tests I was getting a bit worried about the heat being thrown out of the case.
At this point I started to wonder about moving to a water cooled setup but the problem becomes where to put the radiator, above the graphics card doesn’t have much room (and blocks airflow), the bottom of the case leaves you open to running the CPU pump dry. I decided not to rush into things and think about it for a week or two.
Problem #2 overclocking
So in the mean while I started to use AMDs Ryzen master (which now works with HyperV) to investigate overclocking. On my old motherboard a MSI B550M-PRO-VDH-WIFI for a Ryzen 3600 there wasn’t really a power delivery problem, but with the beefier Ryzen 5950X the motherboard VRM wasn’t powerful enough to allow boosting of the TDC/EDC power limits from the lower limits, so this means it’s time for a new motherboard.

Ryzen master power limits
More PC parts are bought
MSI MAG B550 MORTAR WIFI
Time to go shopping for PC parts again. So a new motherboard was bought an MSI MAG B550 MORTAR WIFI after watching some reviews from the guys at Hardware unboxed who did this helpful video B550 VRM thermal benchmarks where they review several motherboards.
bequiet! case
Since the motherboard was coming out anyway I decided to get a new case, I wanted something that could be inverted, gave decent thermals and looked nice. To be honest there aren’t really many invertable case options on the market, bequiet! offer the SILENT BASE 802 which was a little more than I had hoped to spend. It gets pretty good reviews online and the mother board tray can be removed and swapped to an inverted position so the PC can be placed on the left hand side of a desk. It also has a handy slide out tray which you can attach a water cooling radiator to so making fitting everything in a lot easier.
bequiet! cooler
Cooling time, the DH15 is a big cooler and I’m not sure it actually fits in the SILENT BASE 802 case (once I’ve got the fan to clear the RAM). So I also bought the SILENT LOOP 2 360 which has some relatively tasteful ARGB leds on the pump and it has a refill port on the side of the radiator.
Putting it all together
After inverting the case motherboard tray which involves a lot of unscrewing of case bits (bequiet! has a video here as the manual is useless on how to do this) it was time to install the AIO.
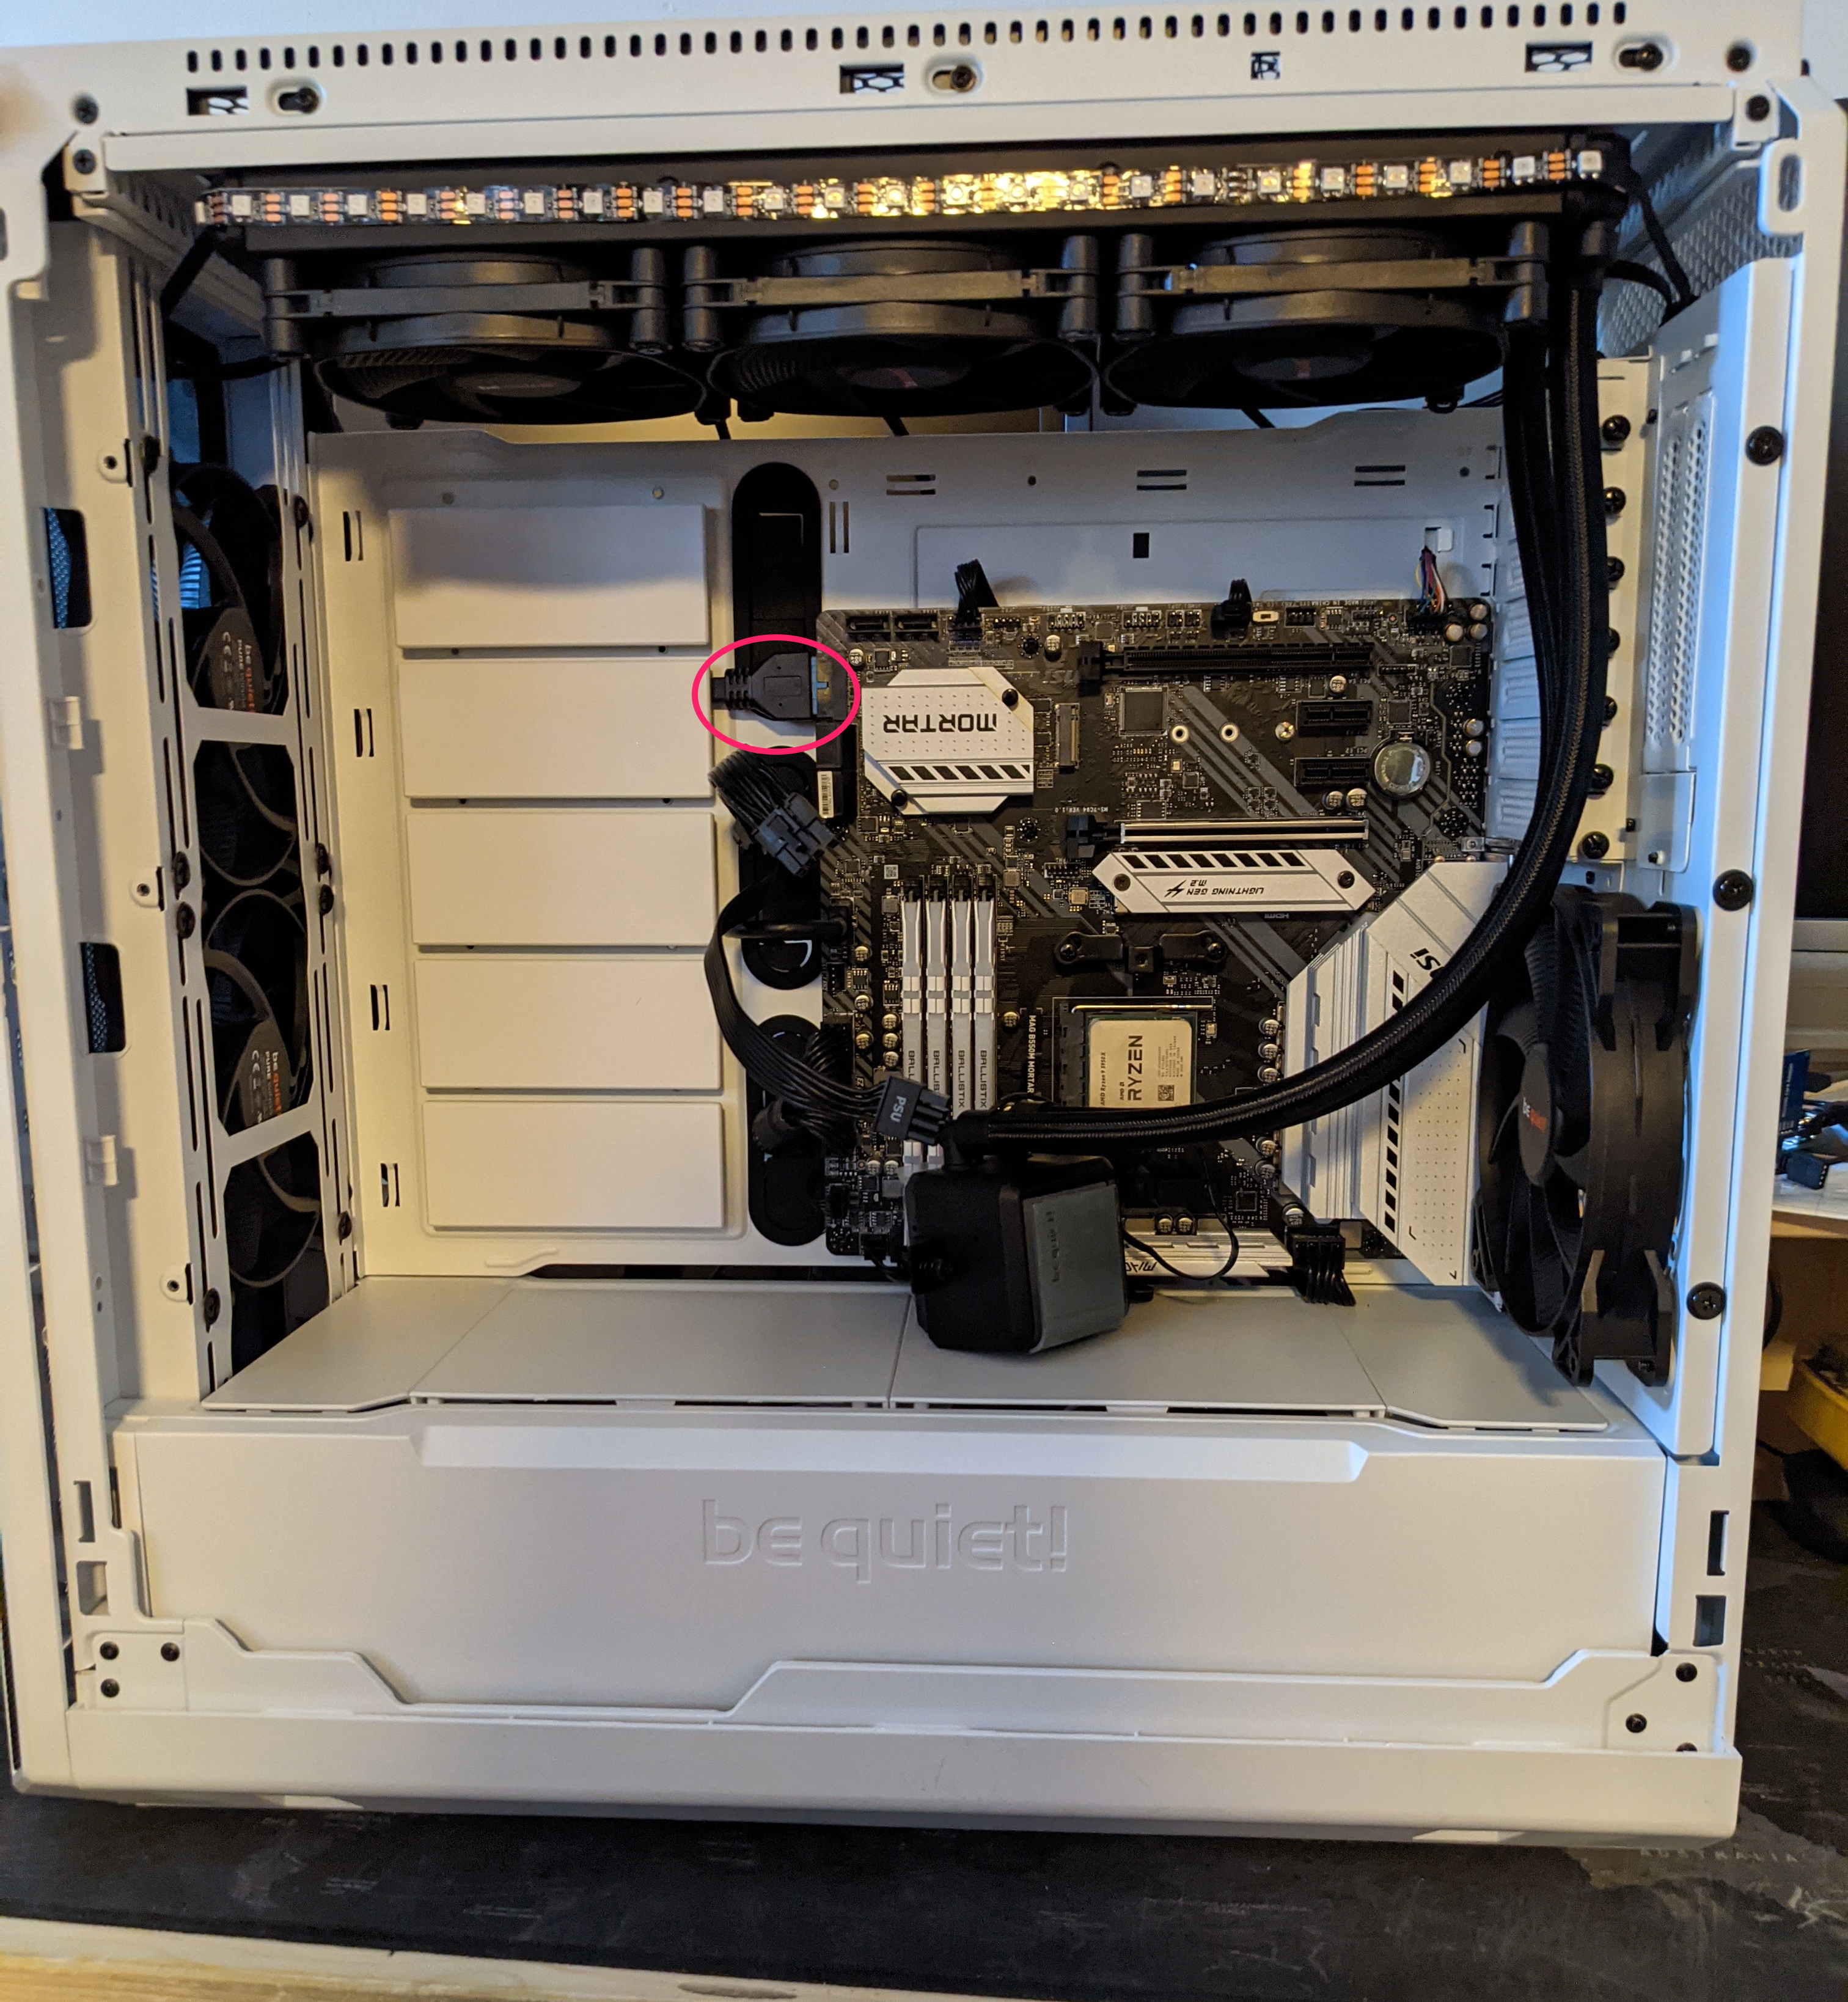
Installing the AIO
One thing I did do was to to feed the front panel USB (circled in red) in via the weird bequiet! floating hard drive bays where it looks quite neat (this was a problem with my earlier cases lack of cable management).
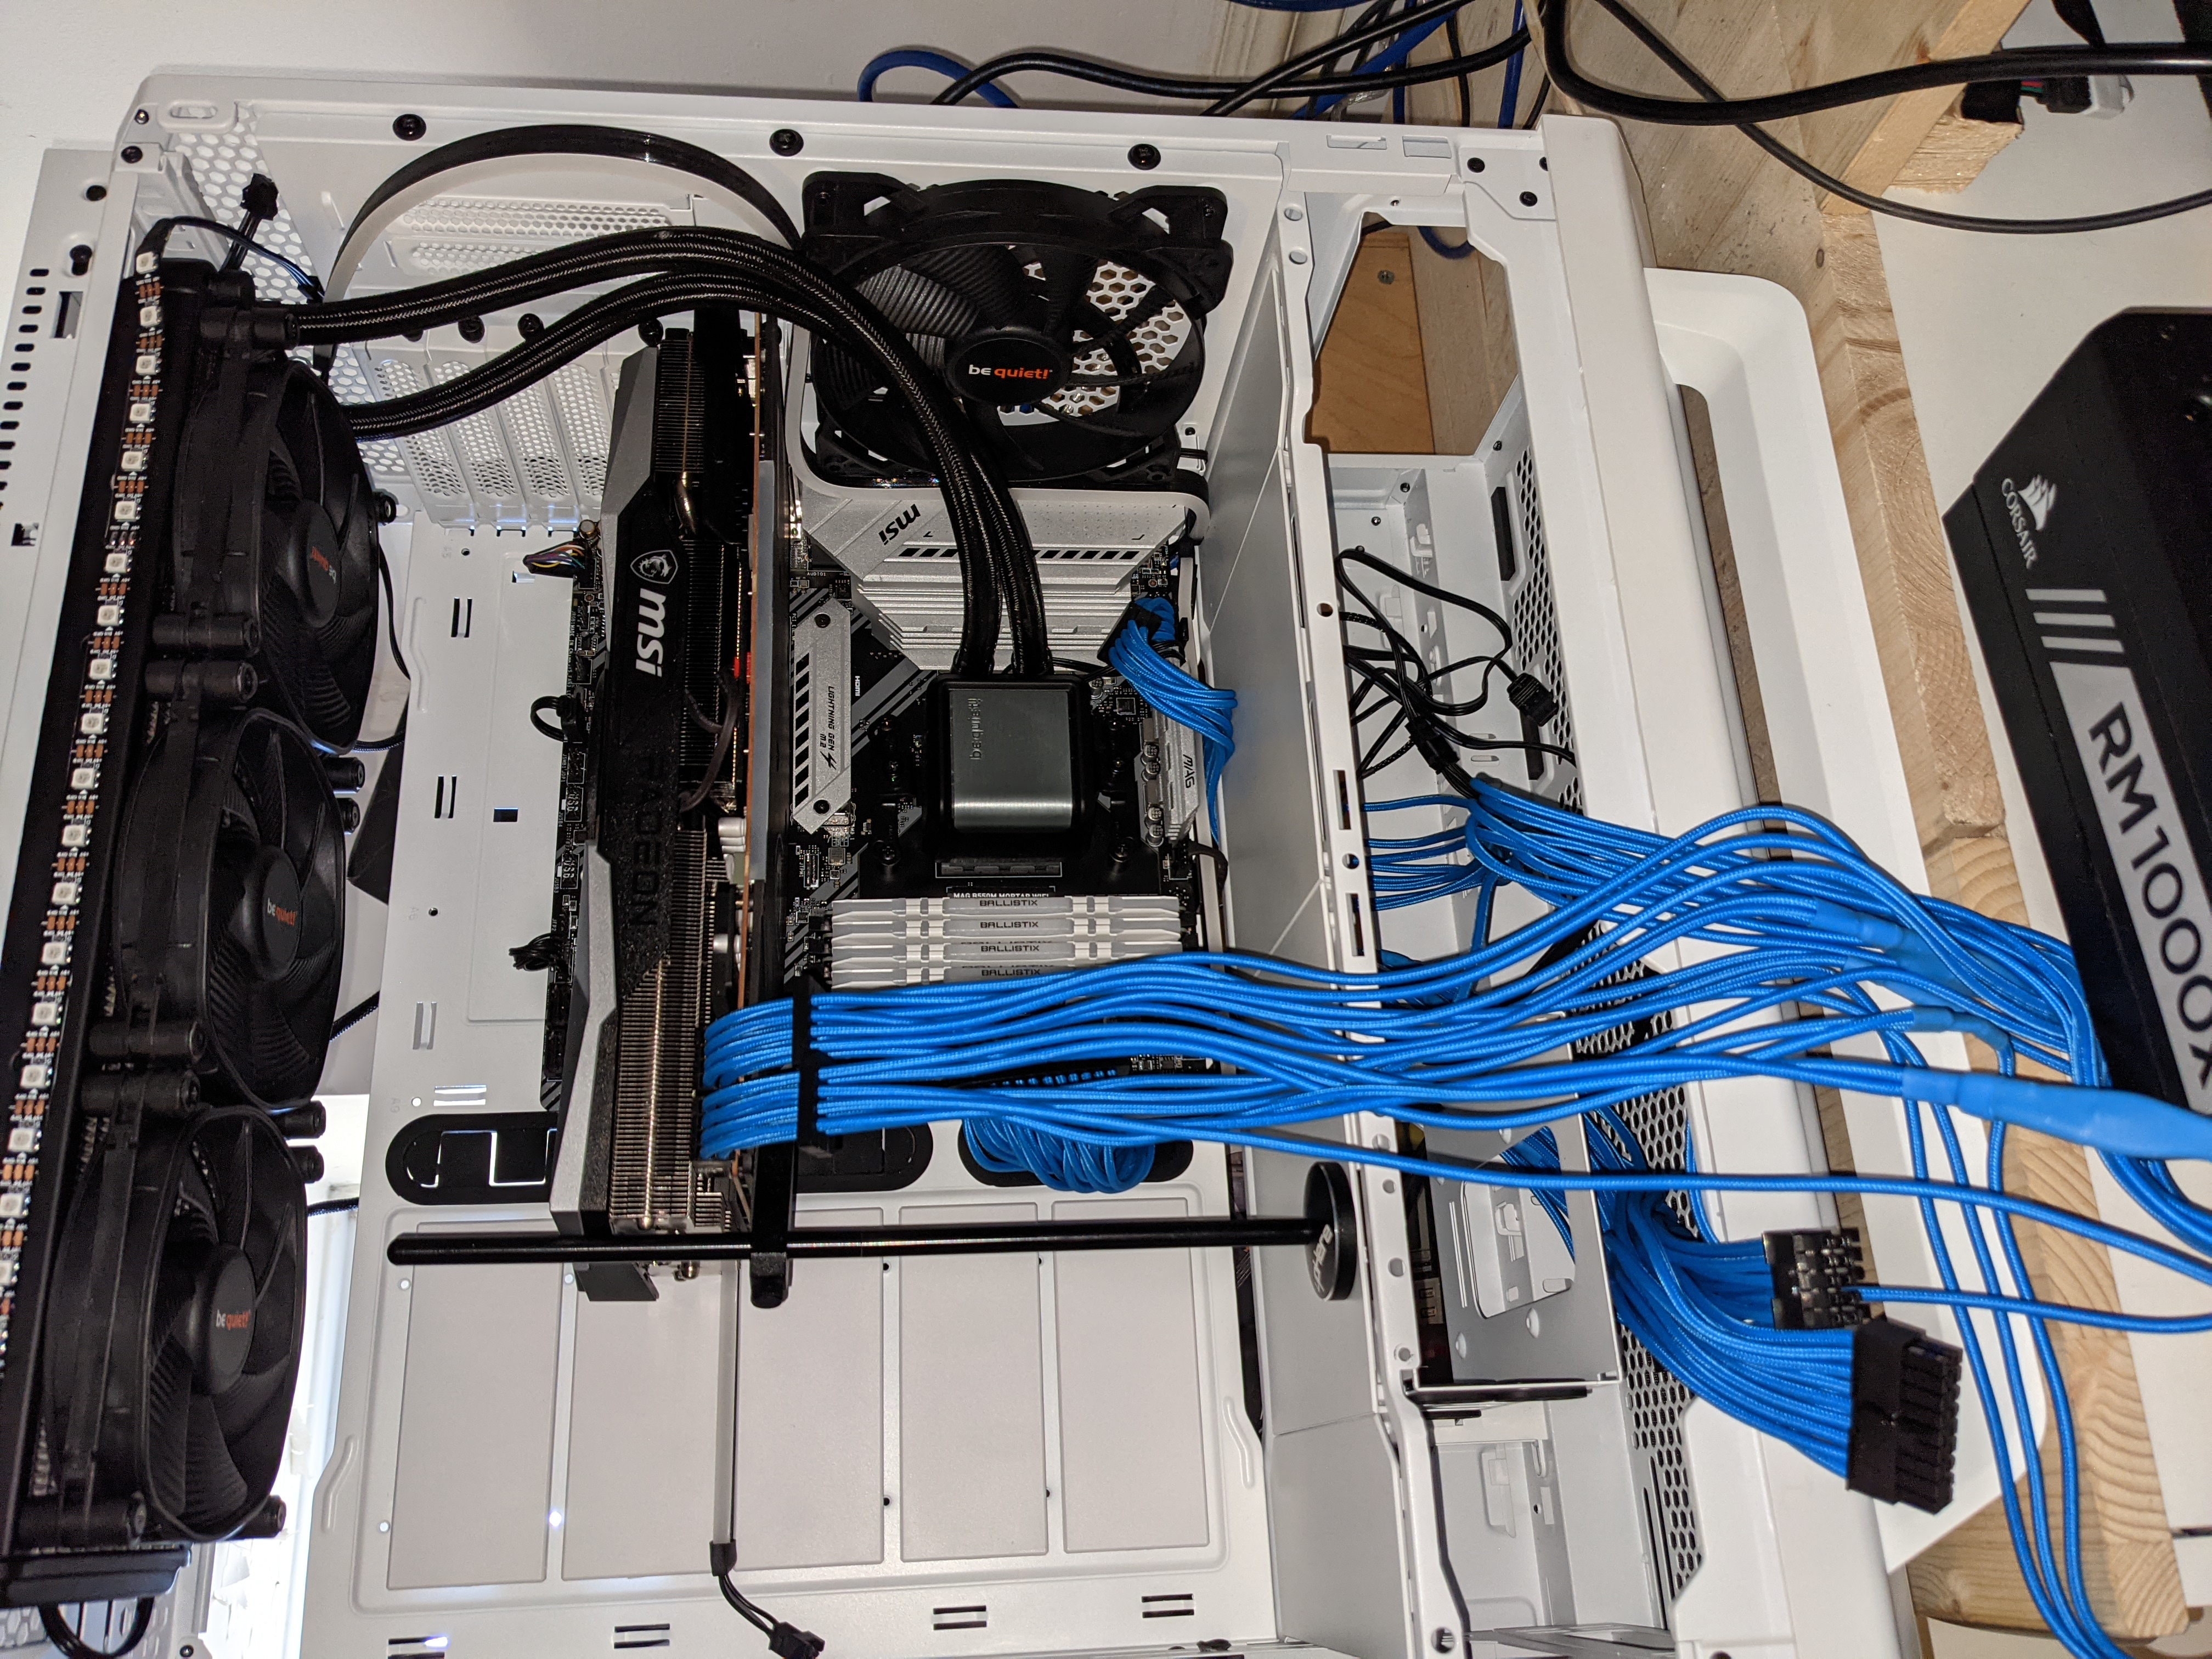
Work progressed and eventually after carefully feeding various cables out underneath the motherboard I ended up with a system looking like this:
Finished, maybe
Now I wasn’t entirely happy at this point. Although I had installed some WS2812B LEDs around the cooler the case looked a bit dull and the PCIE power cables to the graphics card looked horrible. However it was a Sunday by this point and I wanted a system that I could work on for the rest of the week so I sucked it up and went with it.
The bequiet! silent loop 2 isn’t available in the US due to patent issues. You also need to be careful to setup your motherboard pump fan to be in DC mode and supply at least 9 volts as a minimum (usually 75% of 12V). Not a huge issue, but the MSI Dragon Center auto fan tune doesn’t know about this so can’t be used, it will set the pump voltage too low.
PSU issues
I did mull over getting some combed extension cables for the PCIE power and went as far as buying a set of upHere extension cables for £30 from Amazon, but while I was trying out some overclocking settings I discovered that the Seasonic 650W PSU I had been using would shut down if both the GPU and CPU were running at full power.
So time for a new PSU I chose a Corsair RM1000 (although choice is limited at the moment) and the matching Corsair braided cables with cable combs.
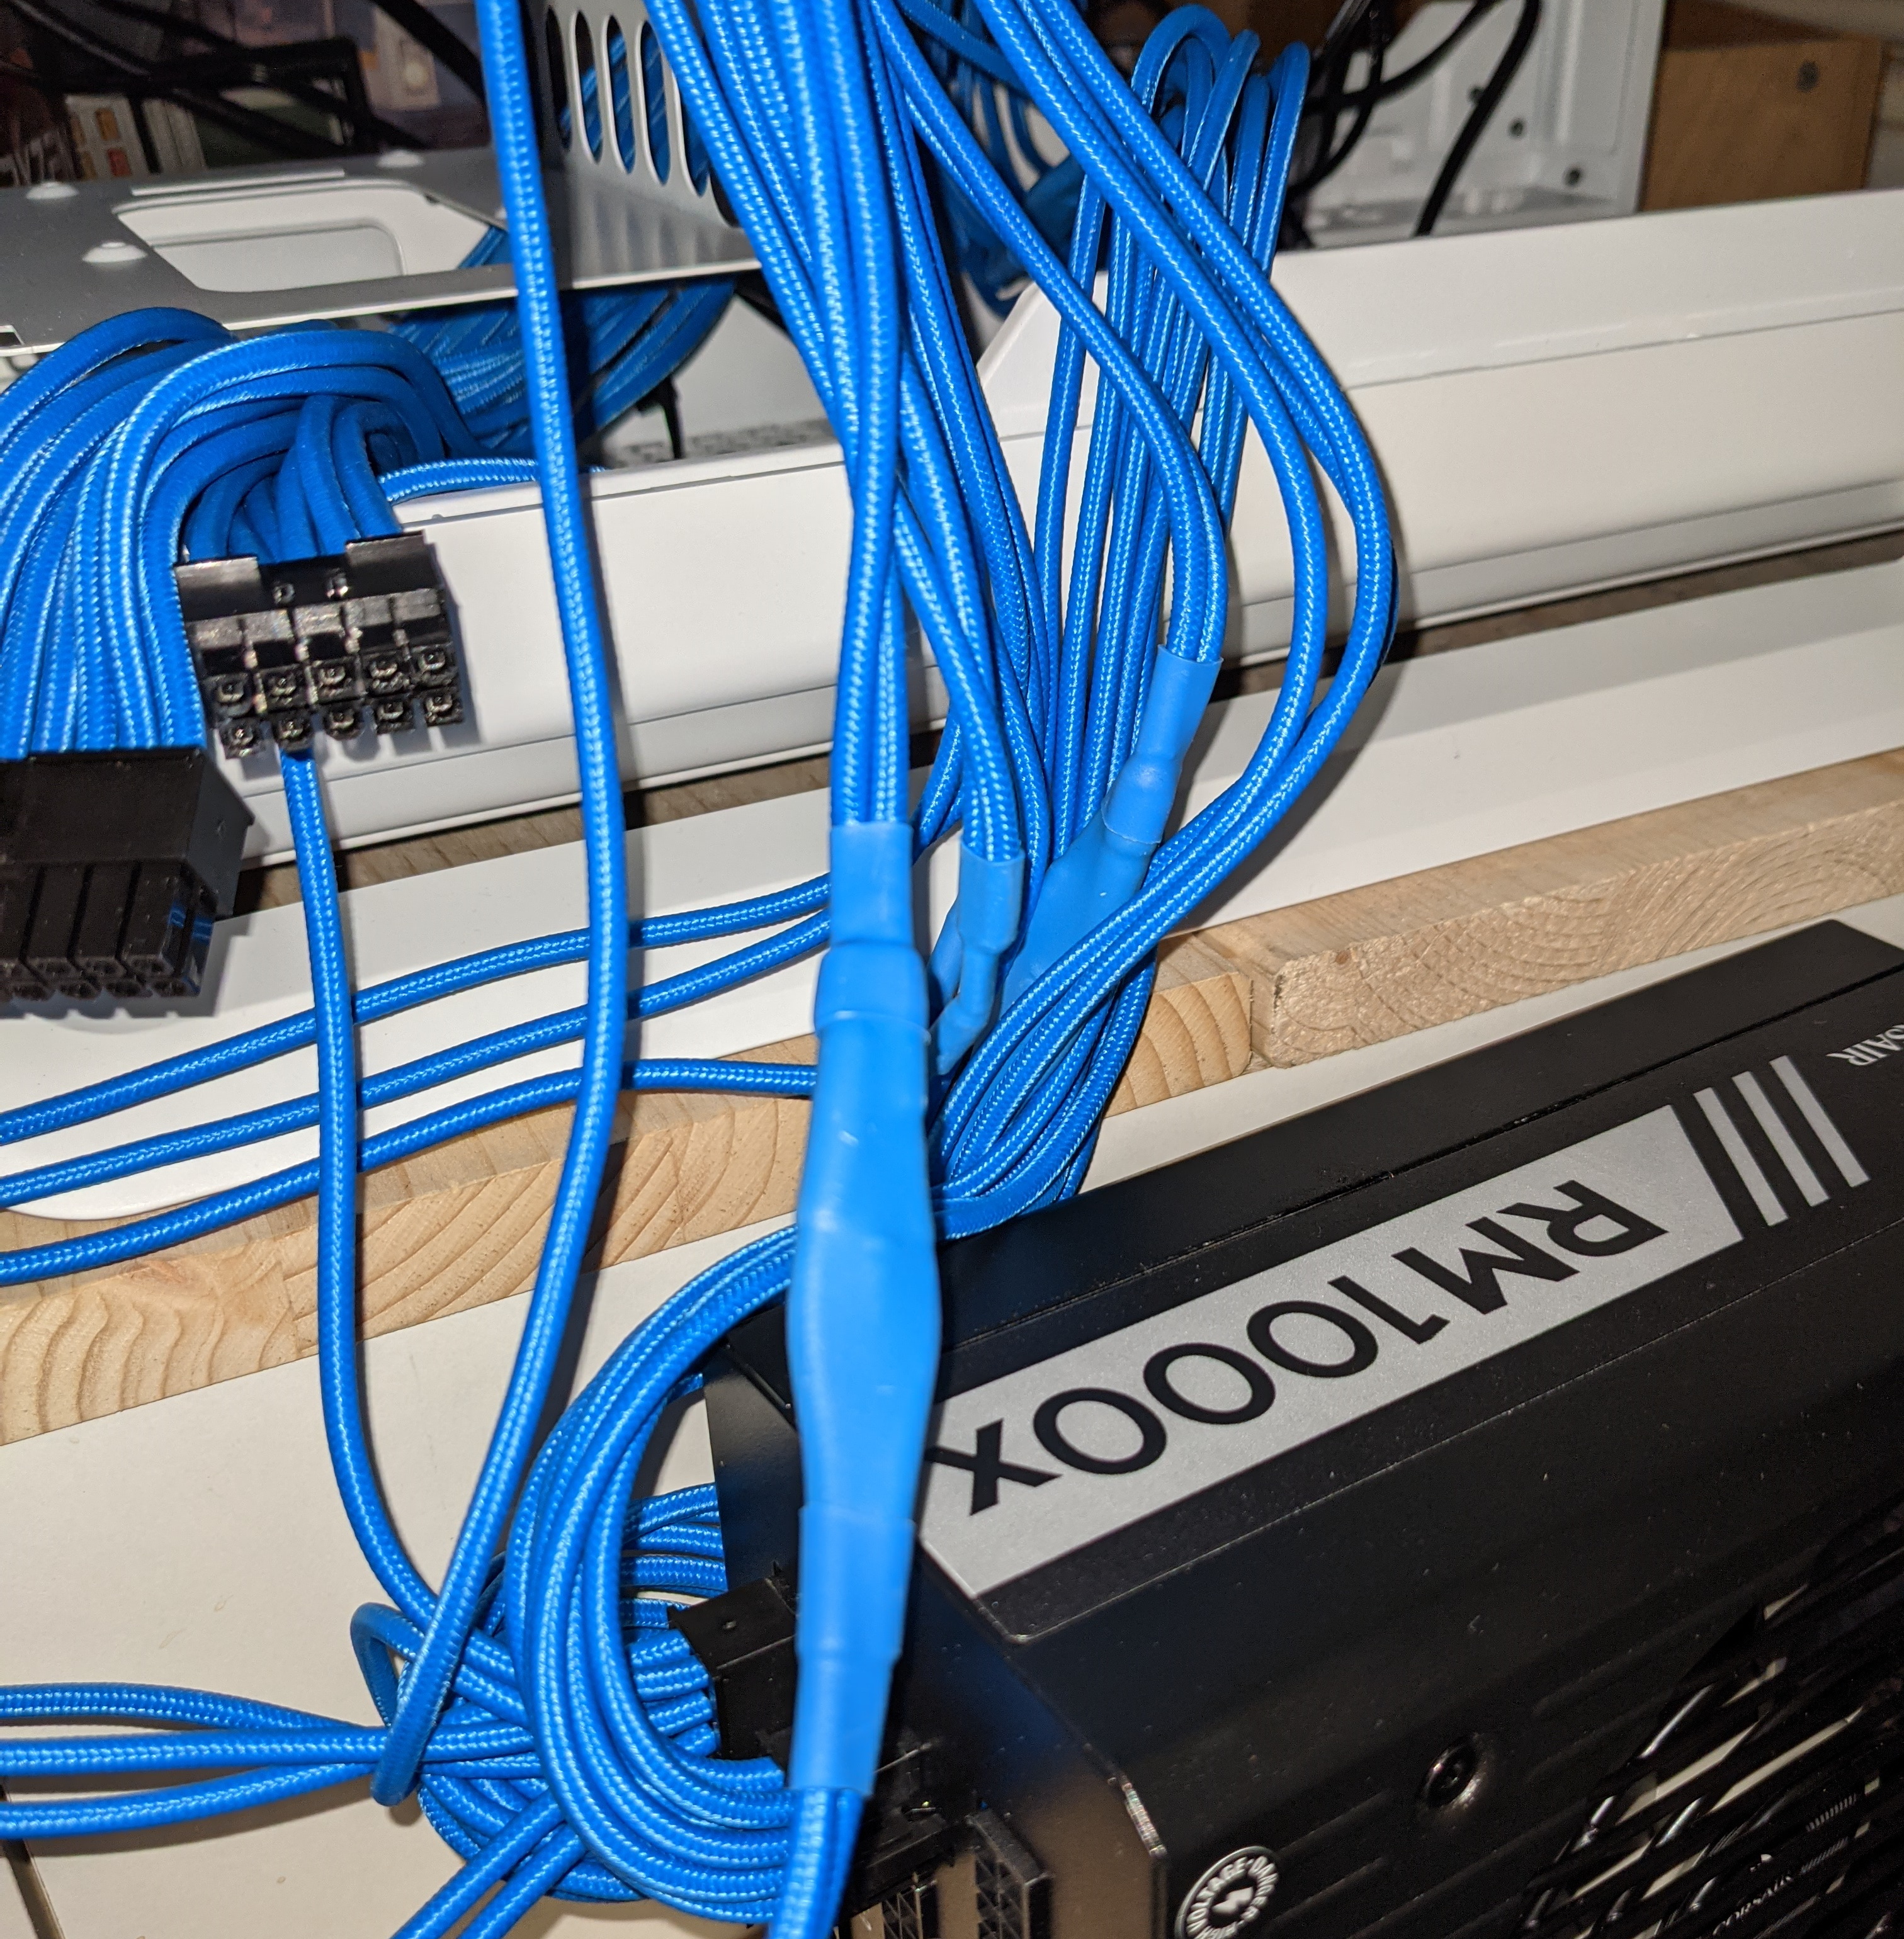
Corsair cables showing capacitors
One advantage of getting original OEM cables is they come with capacitors already fitted into them and a lot less worries about reliability than you get with third party extension cables. Also they’re not that expensive around £50 for a set of ATX and PCIE connectors which don’t have the stupid pair of daisy chained connectors.
Sadly they could do with coming with some more combs for the cable, also the supplied Corsair combs are a bit wide to do a nice neat job with the two PCIE power cables needed by the Radeon 6800XT. Thankfully the upHere cable extension set comes with combs so I used some of those instead.
Time for more lights
One thing I did want to do was to add some more lights to the case interior. I messed around with some WS8218B strips I had left over from the previous build, the ones on the AIO radiator were fine but they didn’t really work around the motherboard as they have no diffuser on them.
In the past I had wondered about the Phanteks Neon Digital ARGB strip which come in various lengths (the 550mm length have 38 ARGB leds in them). They come with little clips you can put over motherboard stand offs so you can run them round the edge of your motherboard. The 550mm length is designed to fit around a full size ATX case so this might be an issue with my mATX form factor motherboard. After a decent amount of thinking about it and measuring things up I bought two of these along with an Phanteks RGB controller as the whole string length (2x24 + 2x38) was probably going draw too much current for the RAINBOW1 connector on the MSI mother board.
Then it was time for some trial fitting.
Test fitting neon and cables
The Phanteks LED strip nicely fitted in between the hard disk bays in the bequiet case but the bottom right hand corner where I wanted to bring the cables through was going to be a tight fit.
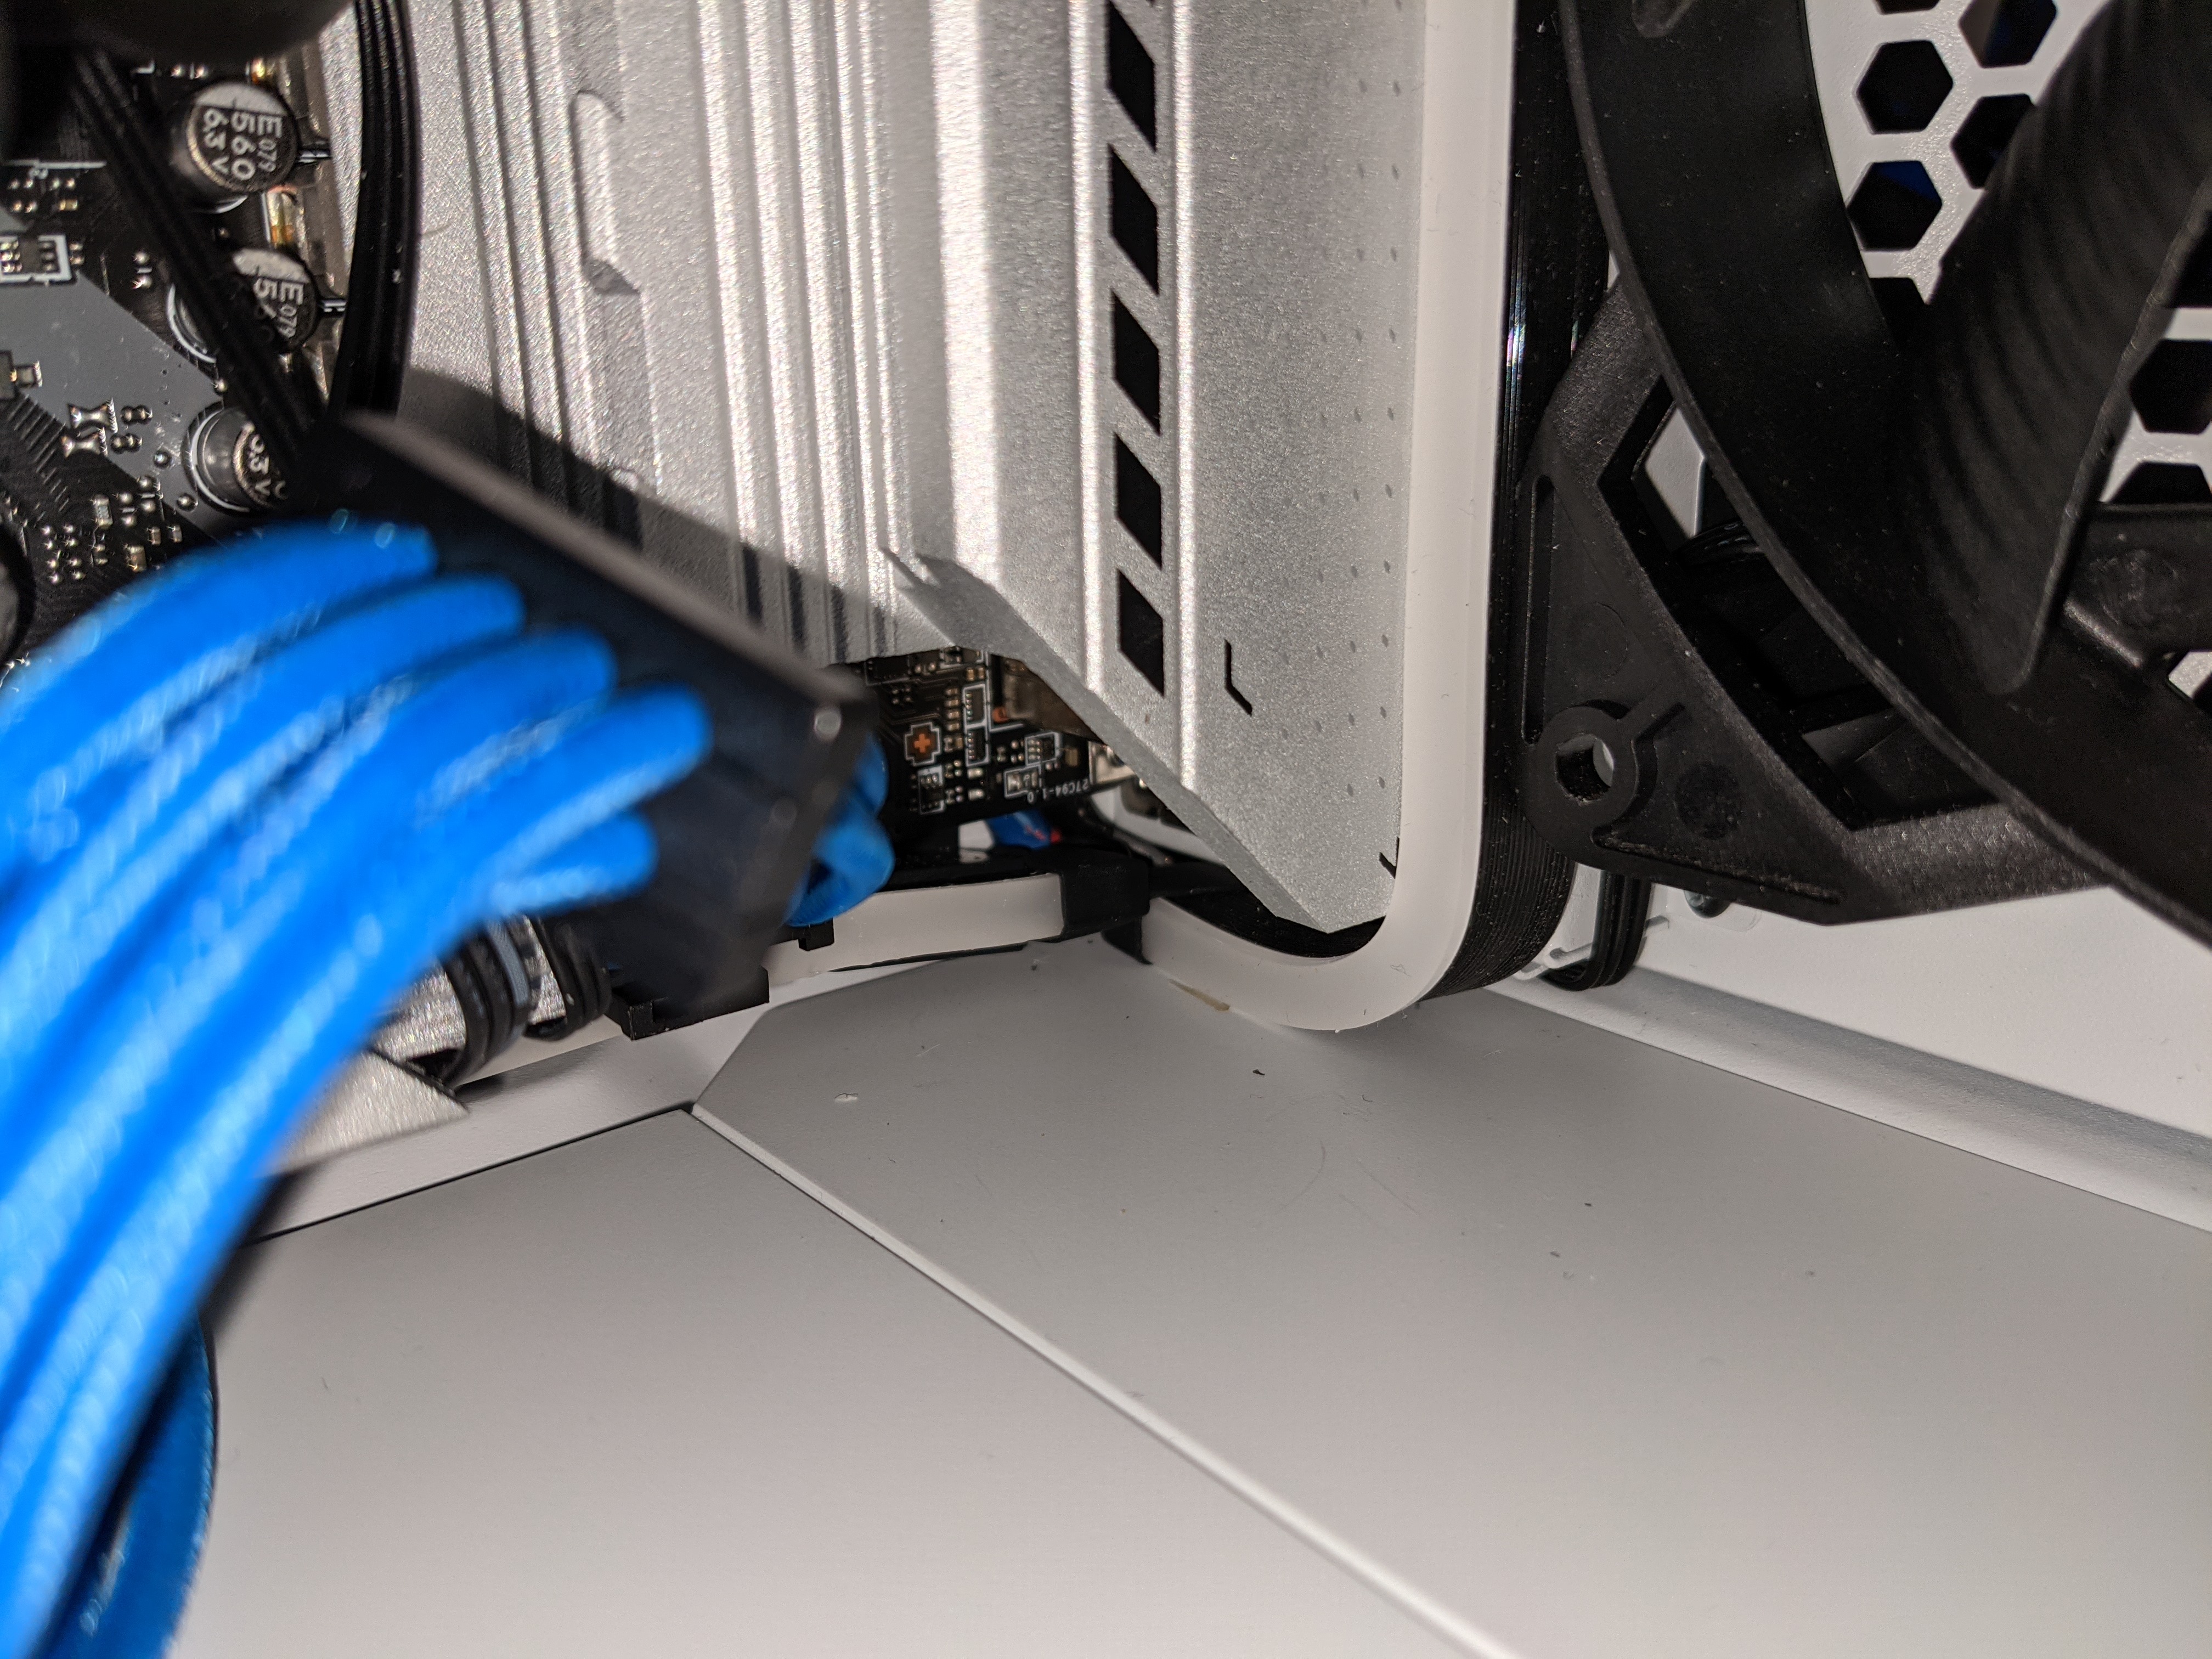
Neon strip in right corner
One problem was the length of cable on the connectors was a bit too short and meant that the connectors would have been squashed between the motherboard and the tray probably pushing the PCB up and causing a stress fracture later on. At this point I grabbed my soldering iron and some heat shrink sleeving and got to work extending the cables so I could bring them through without stressing the PCB. I clipped the leads and removed the black cap off the end of the strip in the drive bays to neaten things up.
Once I’d finished I was left with a nice clean case interior looking like this.
Front finished
I added an extra couple of mounting brackets for the neon after the photograph was taken to neaten things up as bit. Also in this photo you can see the Corsair combs pushing the cables apart due to their width.
Rear of case cable management
After all of that it was time for a little pause. The rear of the case was a mess sadly:
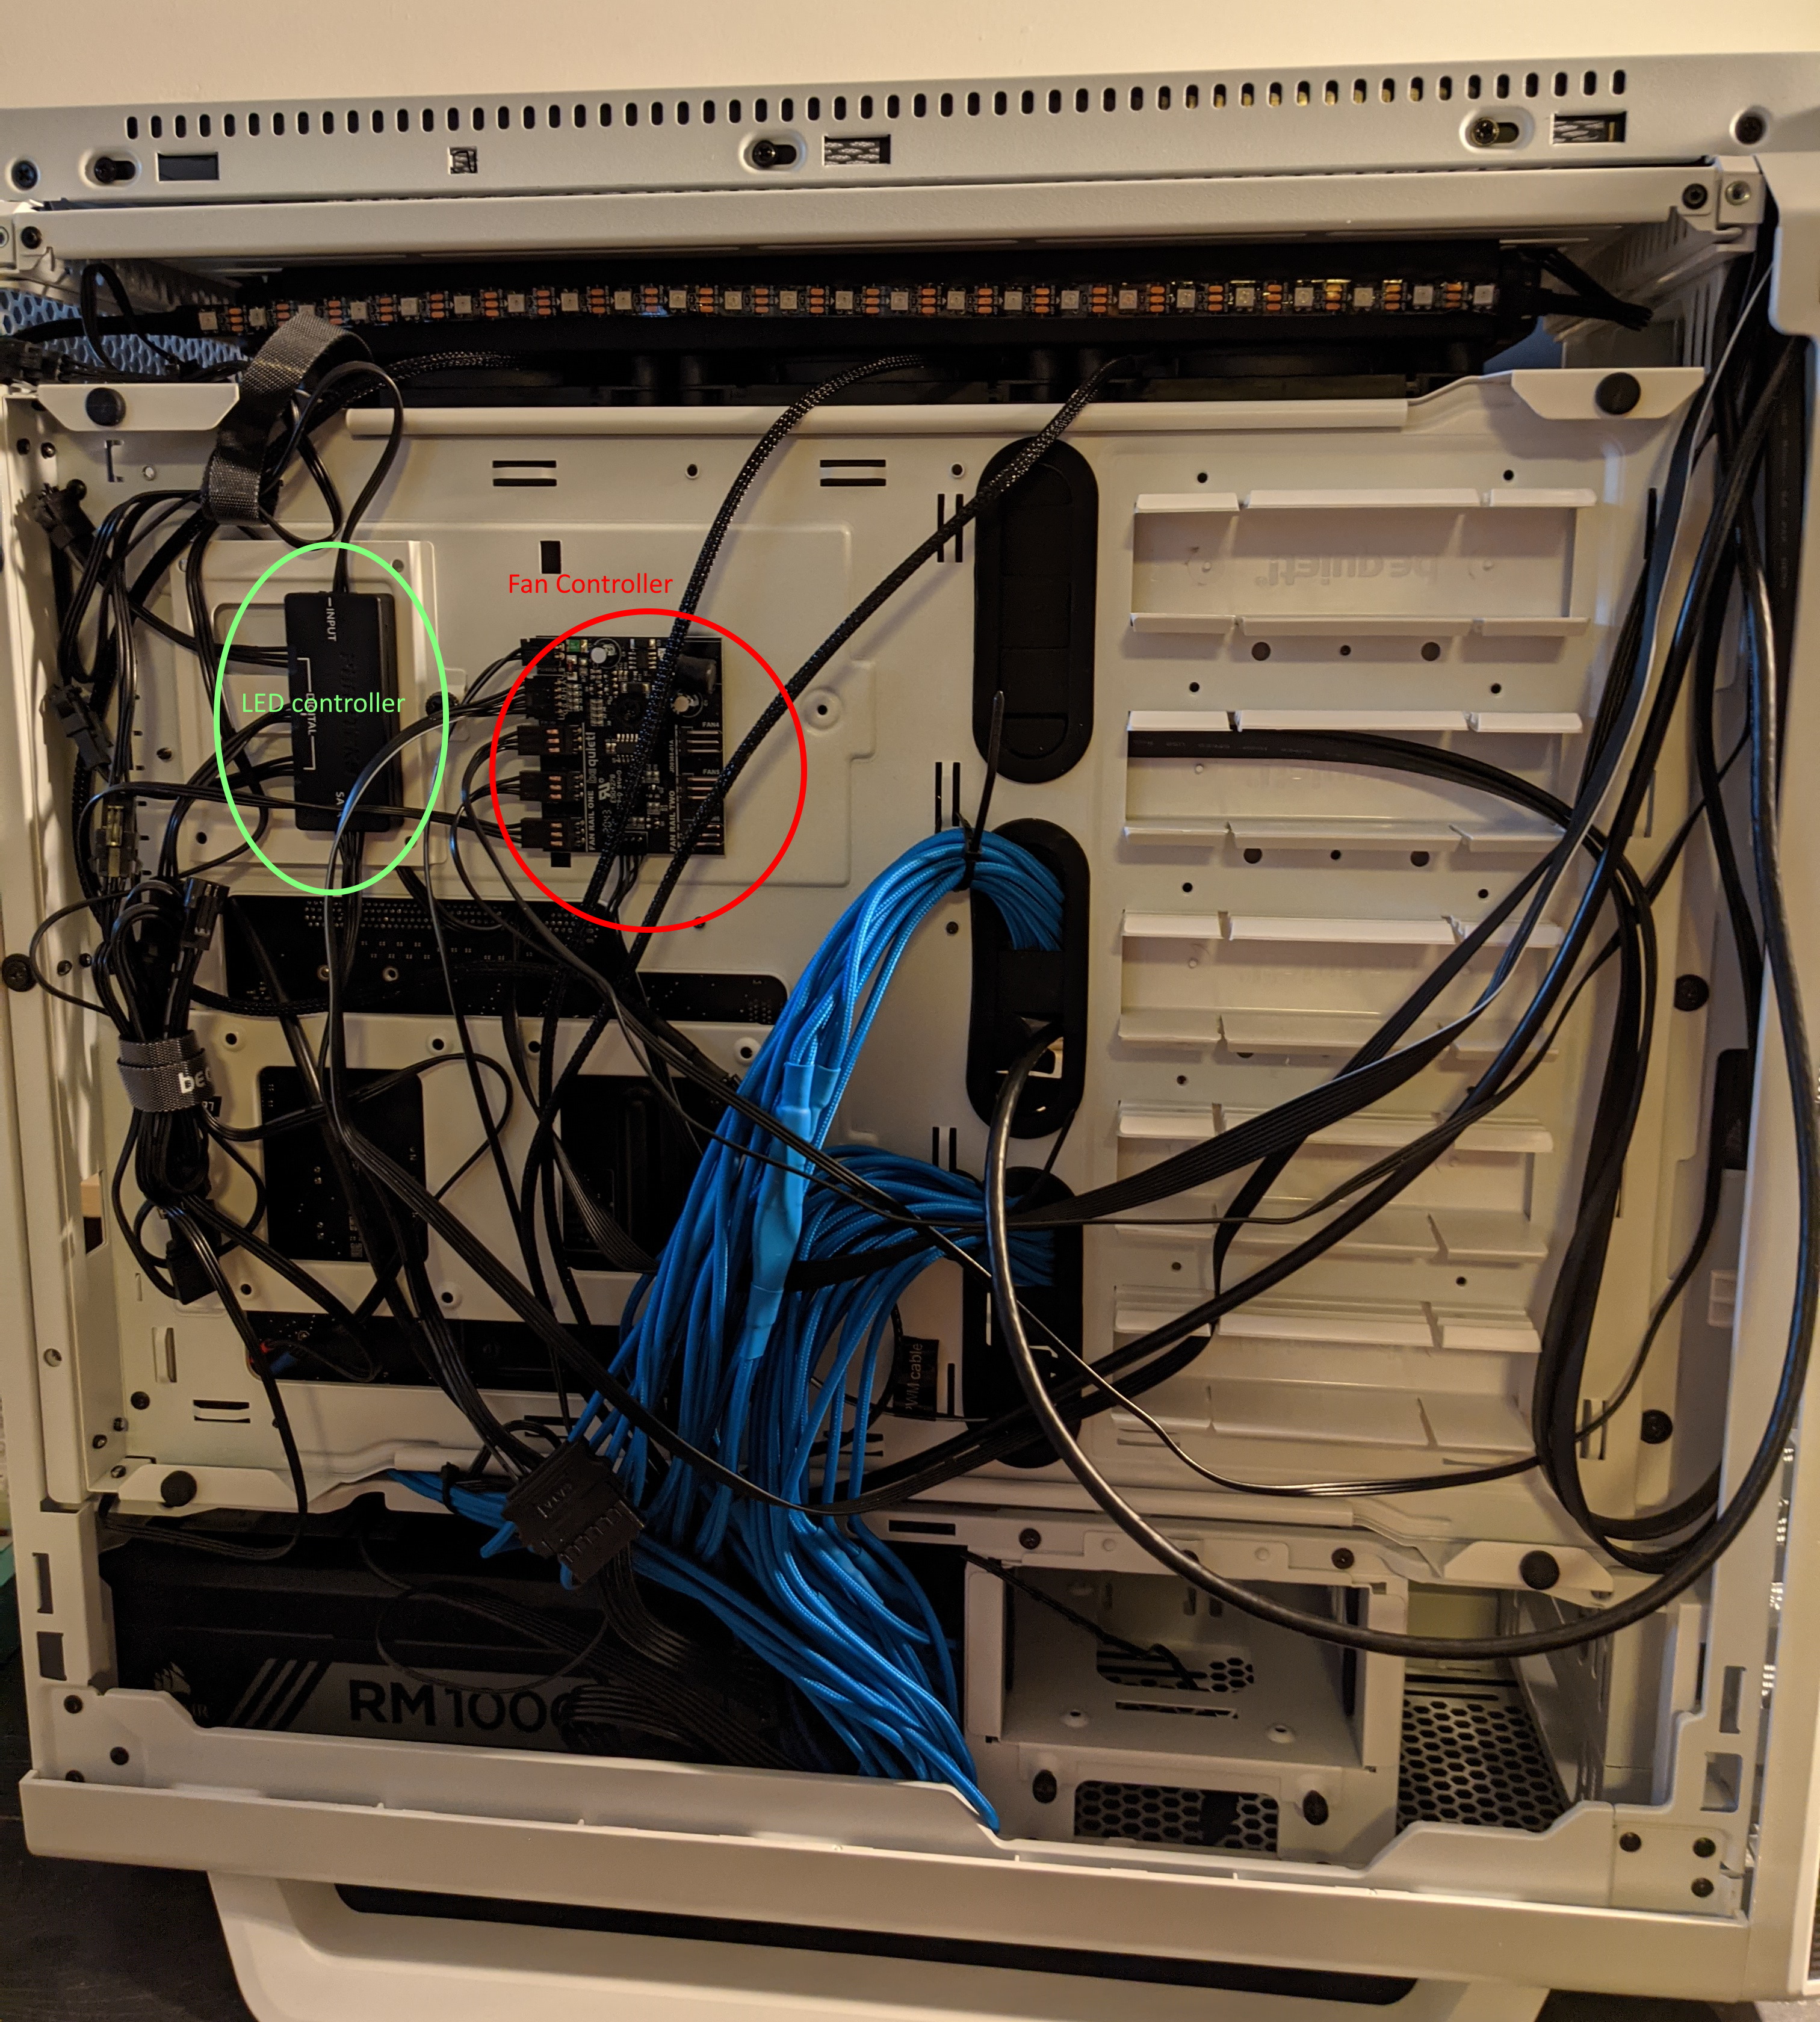
Cable mess
With the LED controller and the case supplied fan control cables being loosely in place a week later I got a chance to clean up the rear of the case.
After a bit of work mid way through looked like this
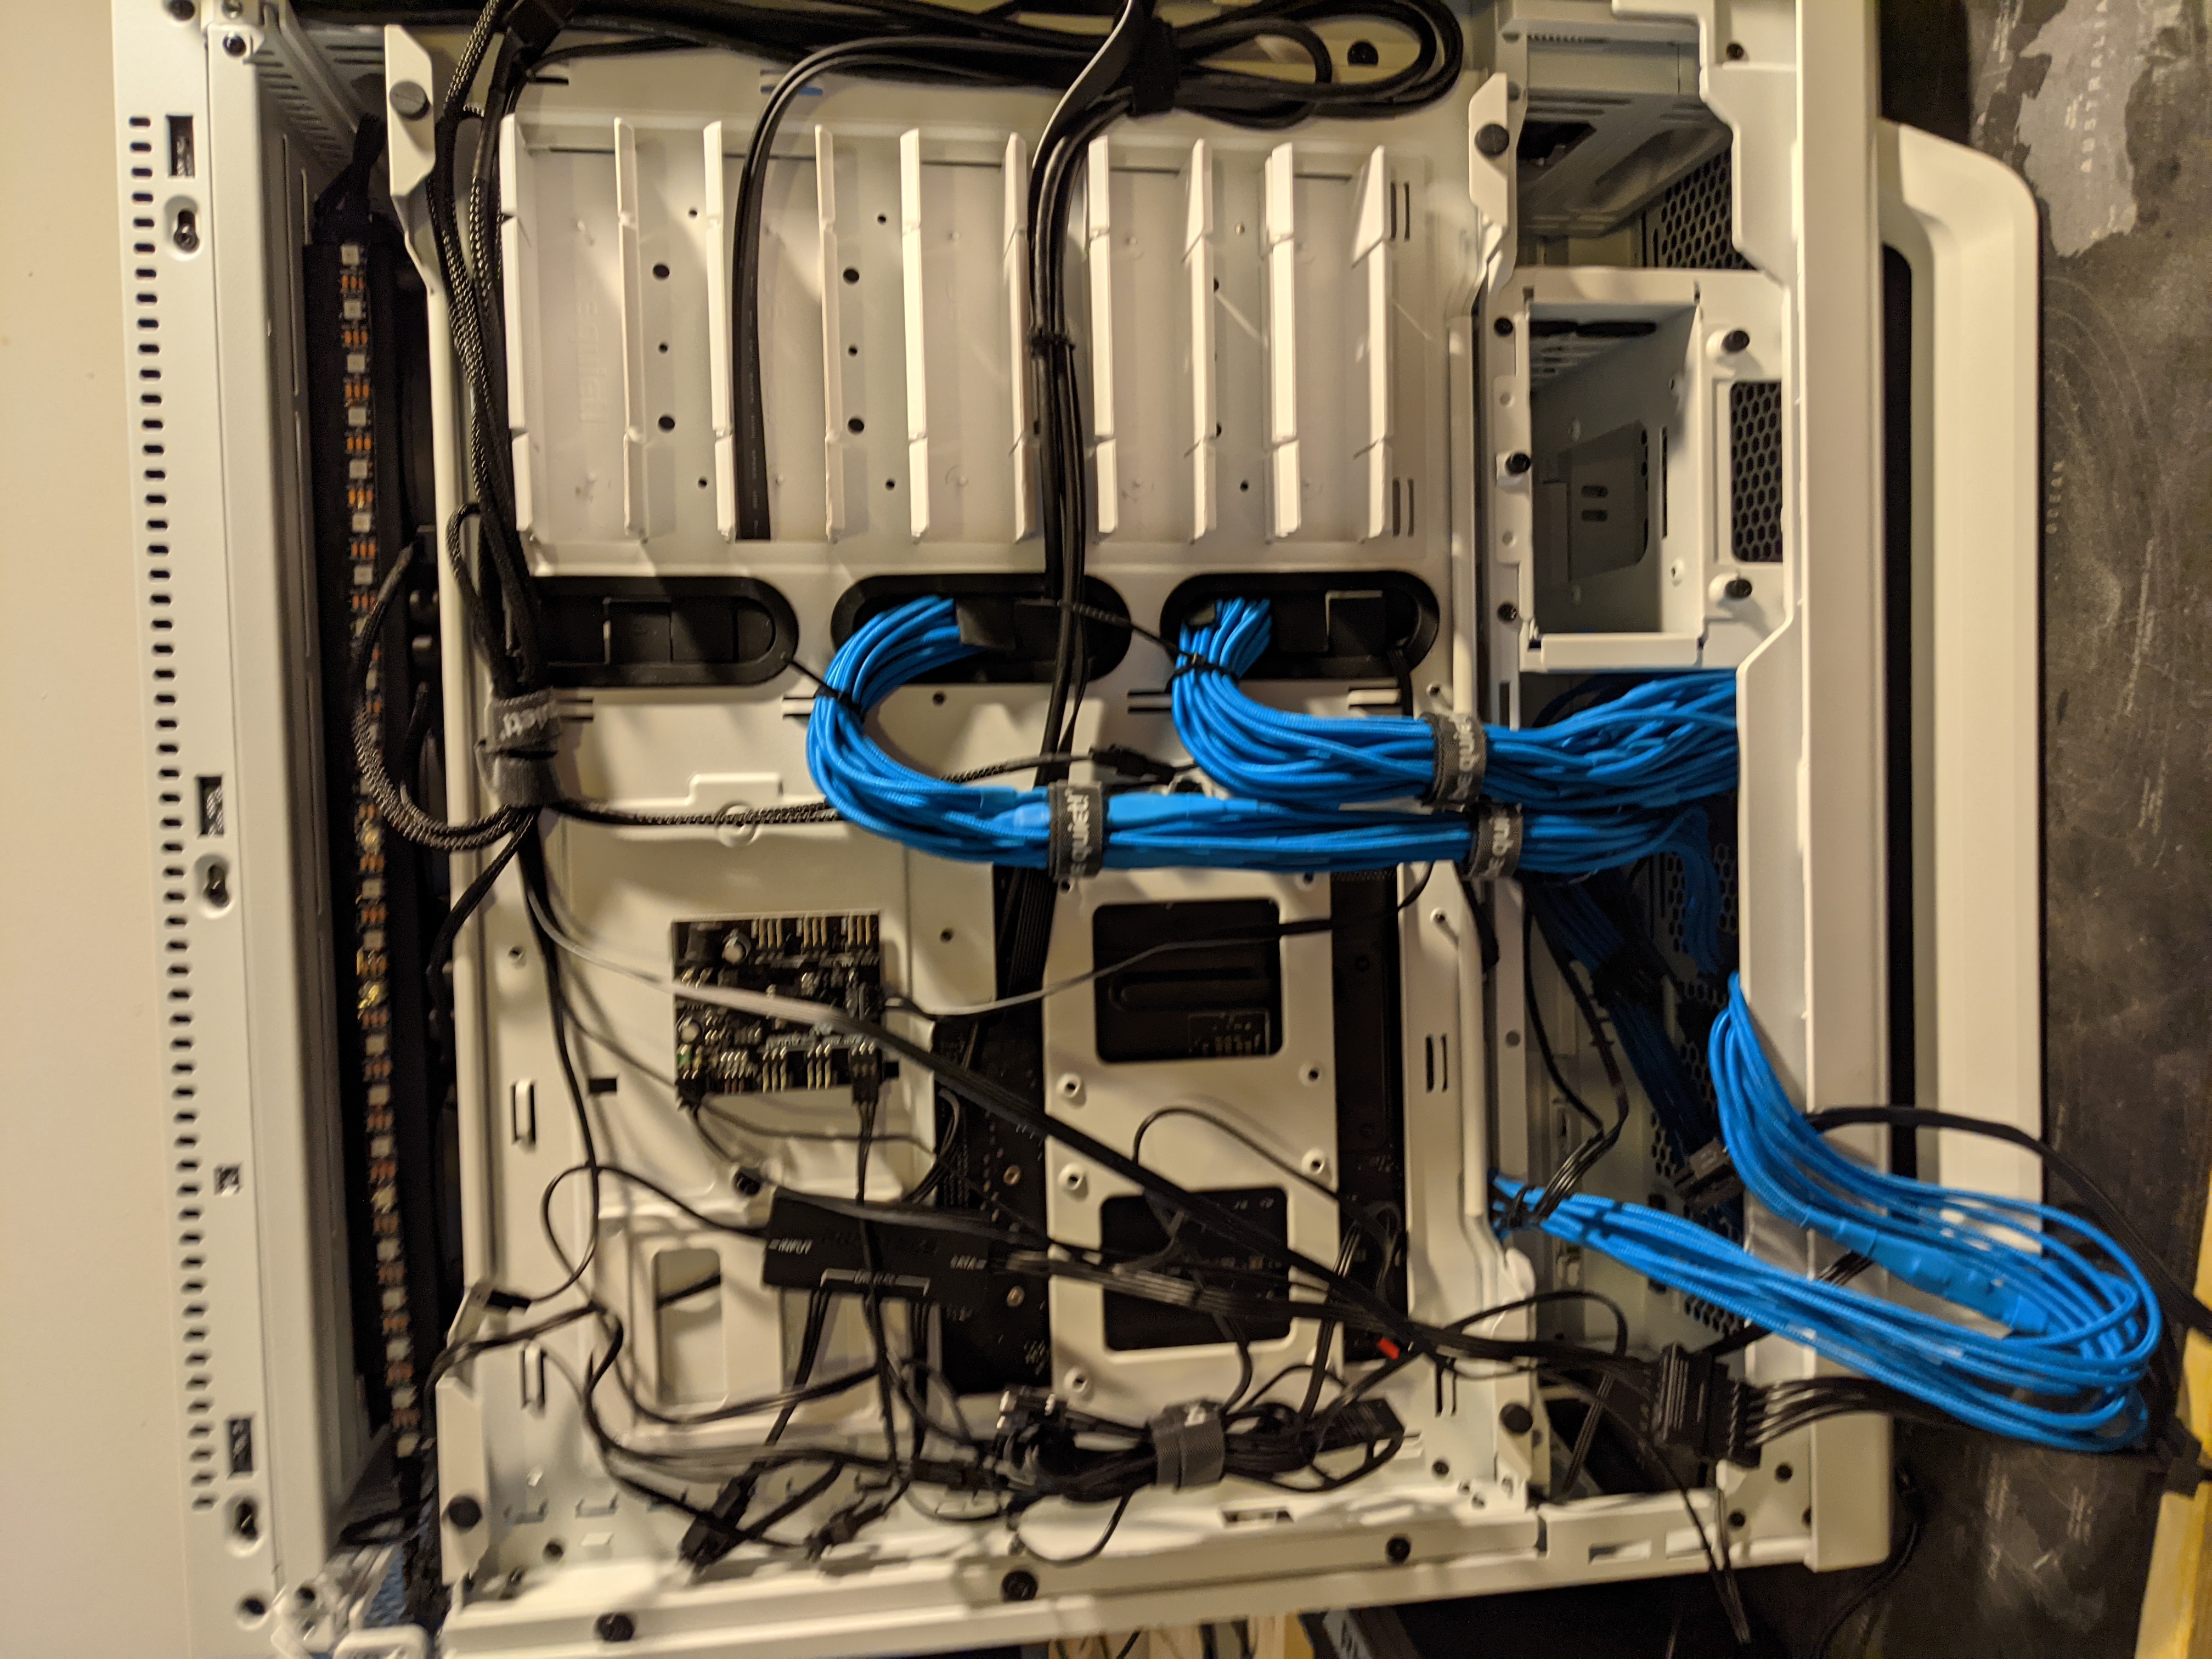
Mid way
The USB ports from the front panel were in place and the PSU cables were tied off reasonably cleanly.
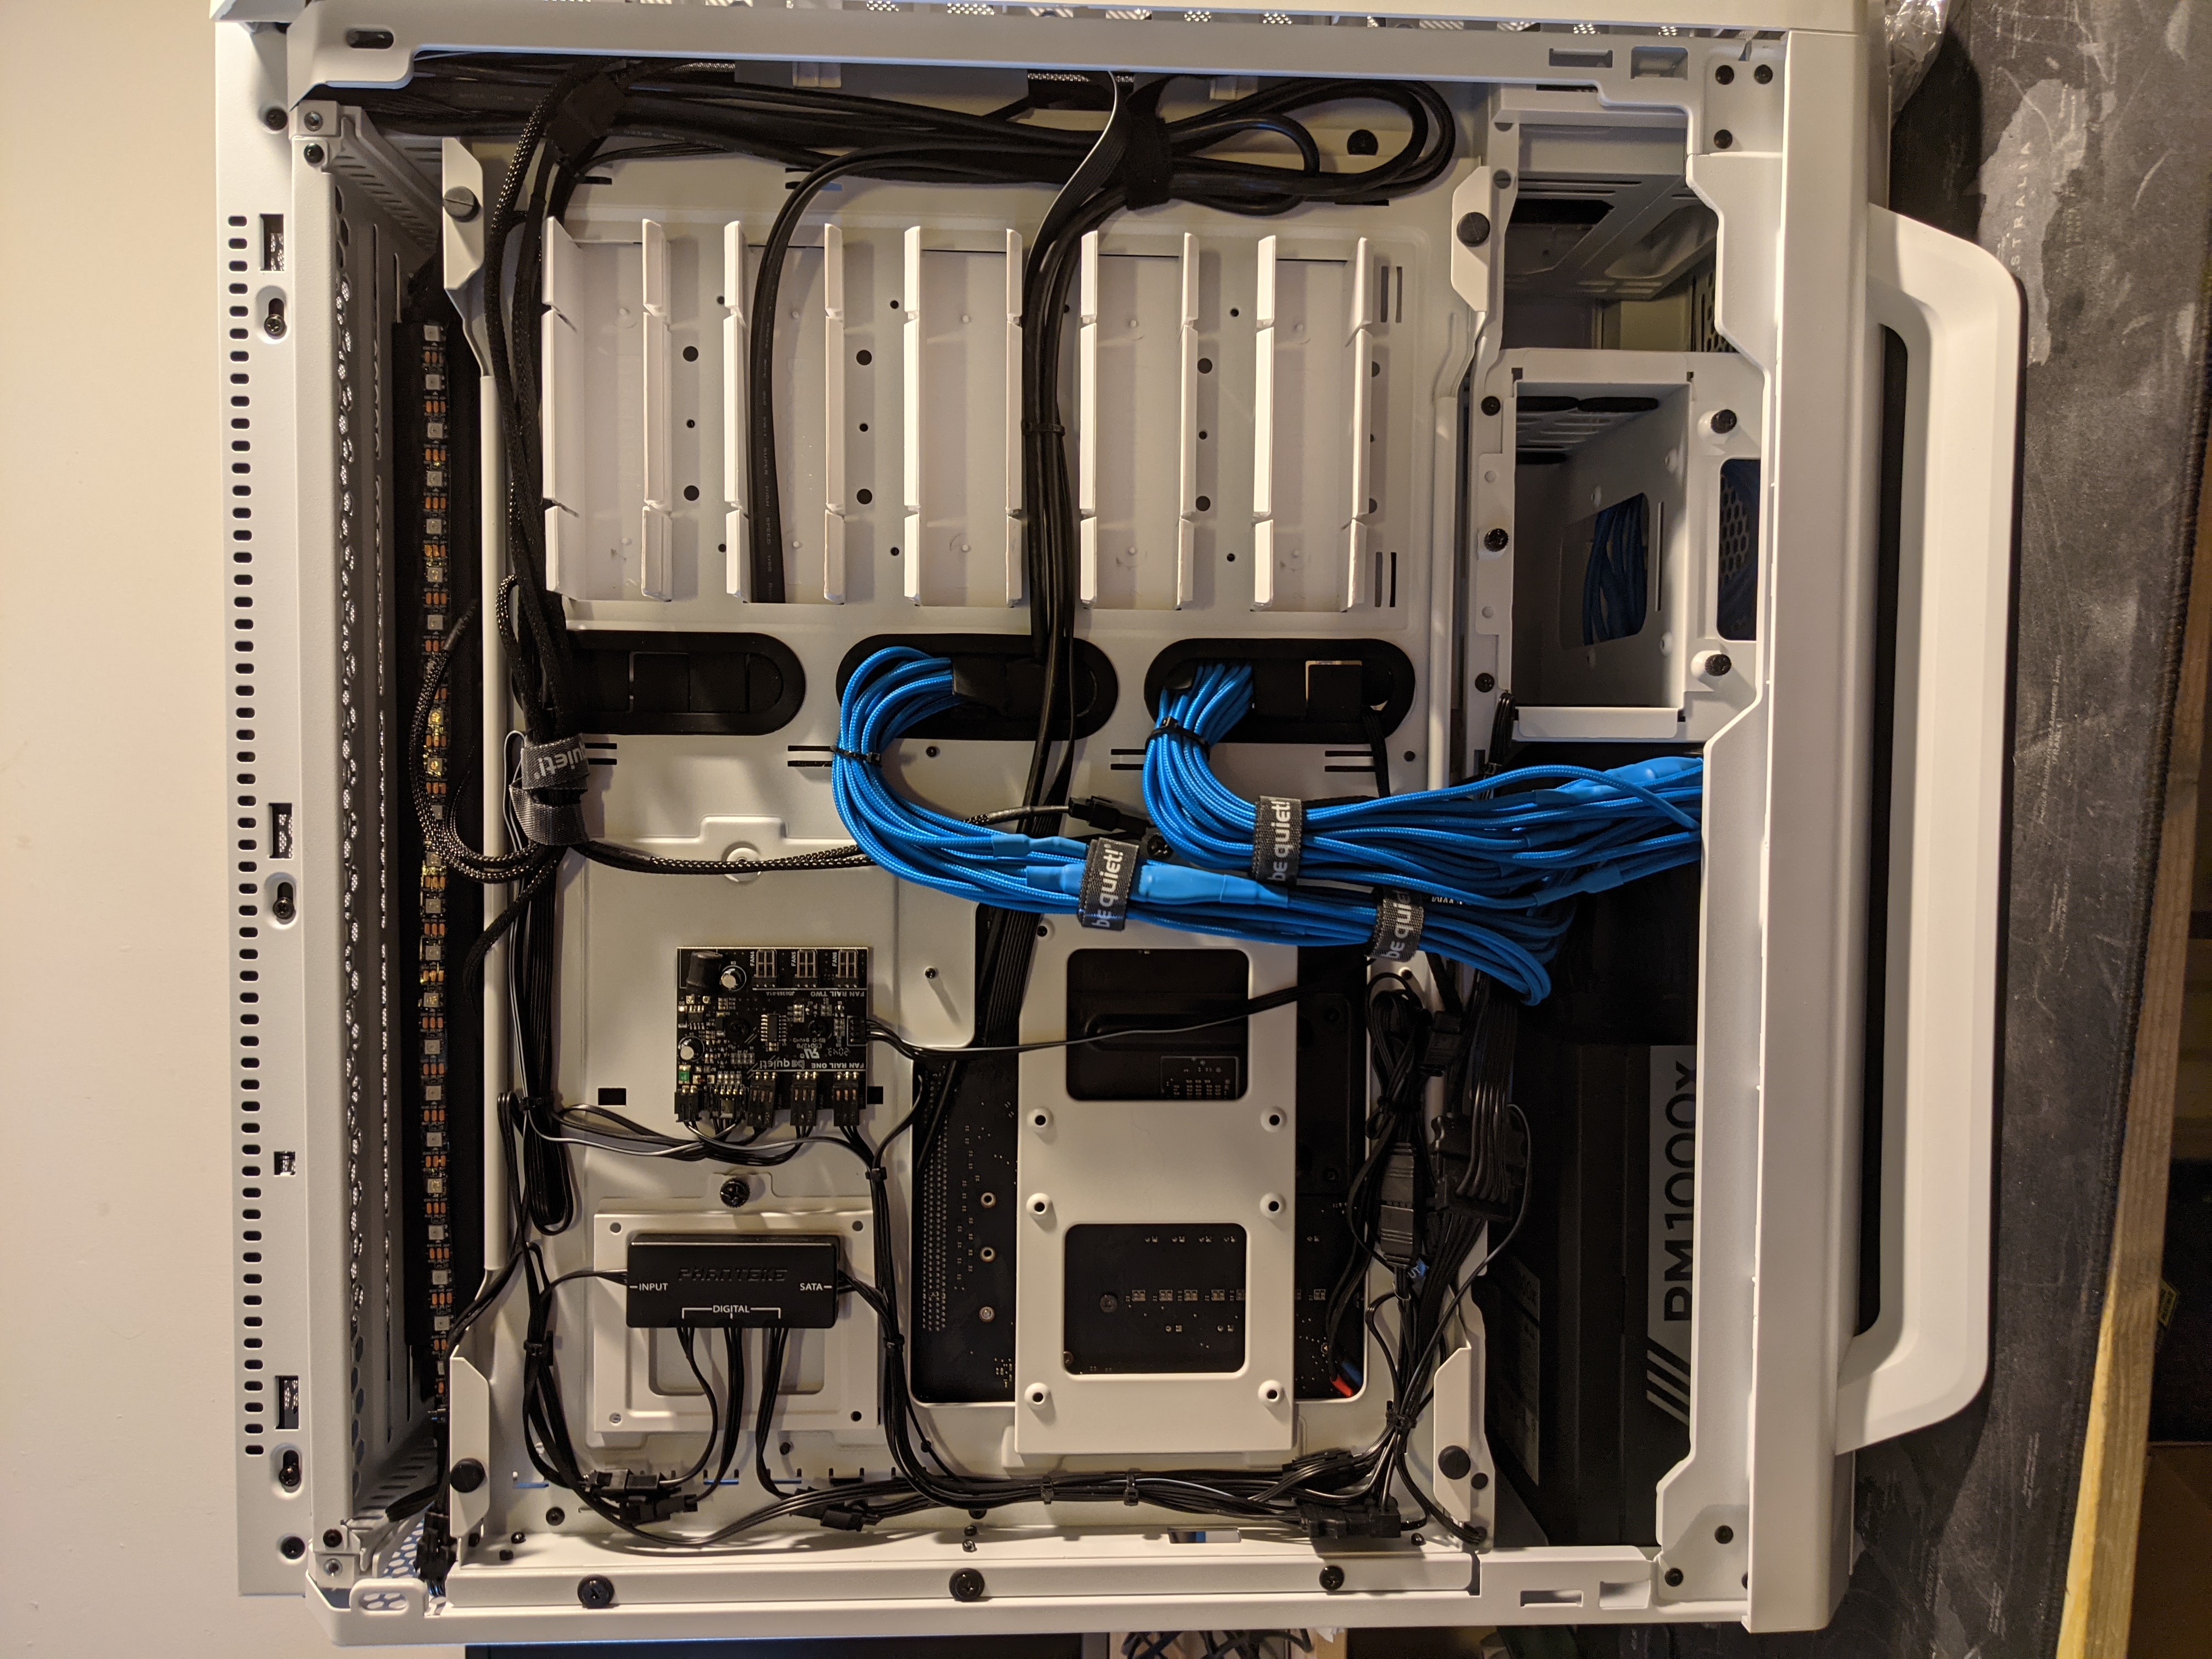
Tidier cables
Finally I was happy enough to call this done. There is some excess cabling from the RGB led stuff at the bottom which is a bit messy. The case fan controller and the Phanteks ARGB controller are both plugged into a SATA power cable. Doing a better job is possible but the amount of effort involved would be madness for a non-show case.
The final result looks like this:
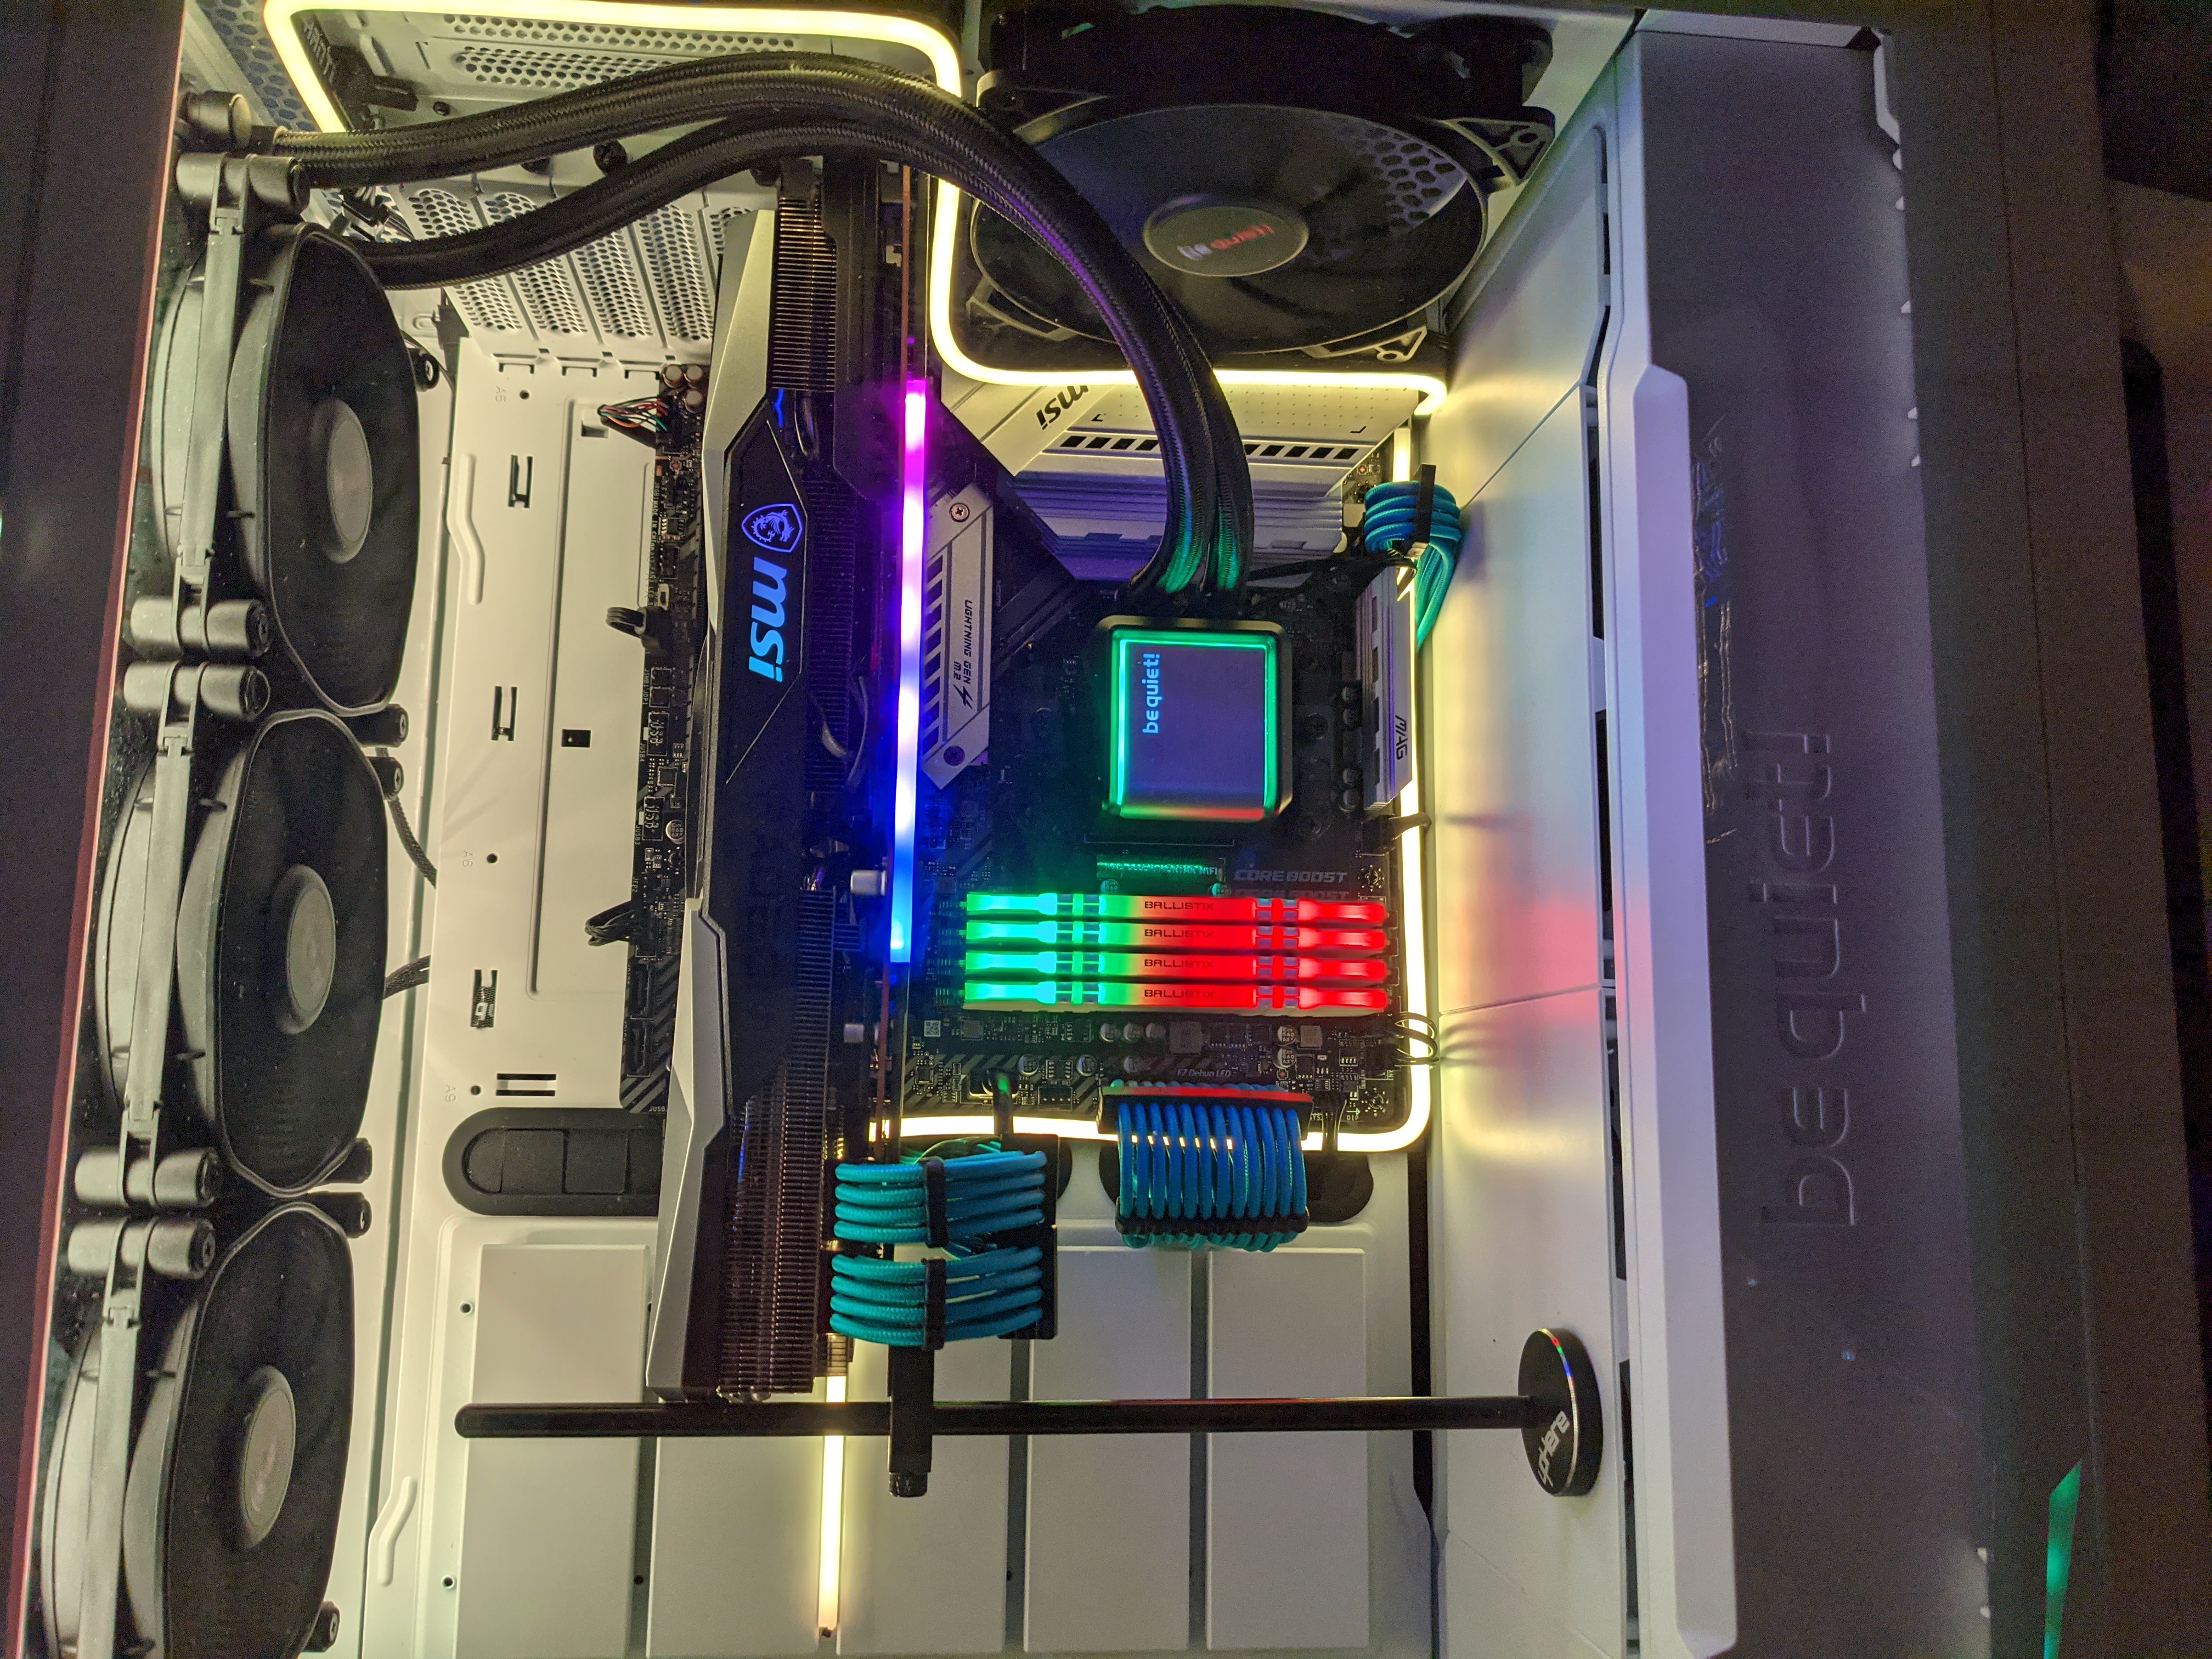
Final result
Parts replaced
| Part | 2020 | April 2021 | May 2021 |
|---|---|---|---|
| Motherboard | MSI B550M VDH PRO WIFI | MSI B550M VDH PRO WIFI | MSI B550M MORTAR WIFI |
| CPU | Ryzen 5 3600 | Ryzen 9 5950X | Ryzen 9 5950X |
| GPU | Radeon RX580 | Radeon RX6800 XT | Radeon RX6800 XT |
| Case | Thermal Take Core V21 | Thermal Take Core V21 | BeQuiet! Silent base 802 |
| CPU Cooler | Cooler Master Hyper 212 | Noctua DH15 | BeQuiet! Silent loop 2 |
| DRAM | 4x16GB Crucial DDR4 | 4x16GB Crucial DDR4 | 4x16GB Crucial DDR4 |
| Storage | Samsung 512MB SSD | Samsung 1TB + 512MB SSD | Samsung 1TB |
| PSU | Seasonic Focus 650W | Seasonic Focus 650W | Corsair RM1000x |
Basically the only parts left over from 2020 was the DRAM (which is why I’ve called this a Trigger’s broom PC). I asked at work if anyone wanted a PC as basically I just had to add RAM to get a complete PC again, a colleague said yes, so now he has a nice mid range PC to work from, as the parts were used I charged 50% of the original cost + the cost of new DRAM.
Rating the parts
Bequiet! SILENT BASE 802 - 4 out of 5
Nice case overall, the cable management options are quite nice. Knocked a point off as would be nice to have a few spare screws in the box and the PSU shroud at the bottom of the case is a bit of a pain to fit, at one point I had it slightly misaligned. When I inverted the case you need to be very careful of the grommets on the screws that hold the motherboard tray in (I lost and found one) and it’s quite easy to end up with them squashed.
One really nice part is that the case comes with both a silent set of panels which are solid and a set of mesh panels that let air flow through.
Bequiet! SILENT LOOP 2 - 4 out of 5
This cools pretty well (but I don’t really have much to compare with) again I’ve knocked a point off as there aren’t spare screws. It would also have been nice if the manual had a suggested set of fan speed cooling curves relative to temperature so idiots like me can set and forget.
Sansung SSD 980 PRO 1TB - 5 out of 5
This is really nice, it’s a super quick SSD that makes use of the PCIe 4.0 M2 connector it’s attached too.
Corsair RM1000x - 4 out of 5
Knocked a point off this as it’s cable combs aren’t really up to the job and really there should be more of them supplied.
CPU & GPU - 5 out of 5
These are both killer parts and make the PC really fire on all cylinders. Shame I needed a new PSU to get the most out of them.
MSI B550M MORTAR WIFI - 4 out of 5
Fixes my power issues. I’ve stolen a point from this as I have a weird RGB issue where it sometimes resets the pattern (particularly noticeable on a clock pattern) and like the VDH PRO WIFI it is a bit fussy on RAM.
View from my chair
Thankfully when viewed from my chair the graphics card stand melts into the cables so isn’t very visible.

View from my chair
I’m happy with the end result. I just need to sort the cables from the back of the PC and tidy them up a bit… Something for another day.