Keyboard build - Part four - Firmware
The melody 96 keyboard uses qmk running on an ATmega32U so in order to change the keymap the firmware needs to be rewritten.
The recommended way to change the is to use a mix of products starting with installing qmk toolbox so we can flash a new keyboard. We then use kbfirmware.com to compile a new firmware to upload into our keyboard.
Building new firmware
I need to change the key board mappings so I can move the function keys around and set the Ctrl, Alt, Meta and Fn keys in the right spots and remove the arrow key T cluster that aren’t being installed.
Step one is to upload the me96.json file (this file is also available via the YMDK store) on the initial page of the kbfirmware.com. Once that has been done the initial screen looks a bit scary with all the wires on screen (this is worse for melody 96 due to row / column arrangement).
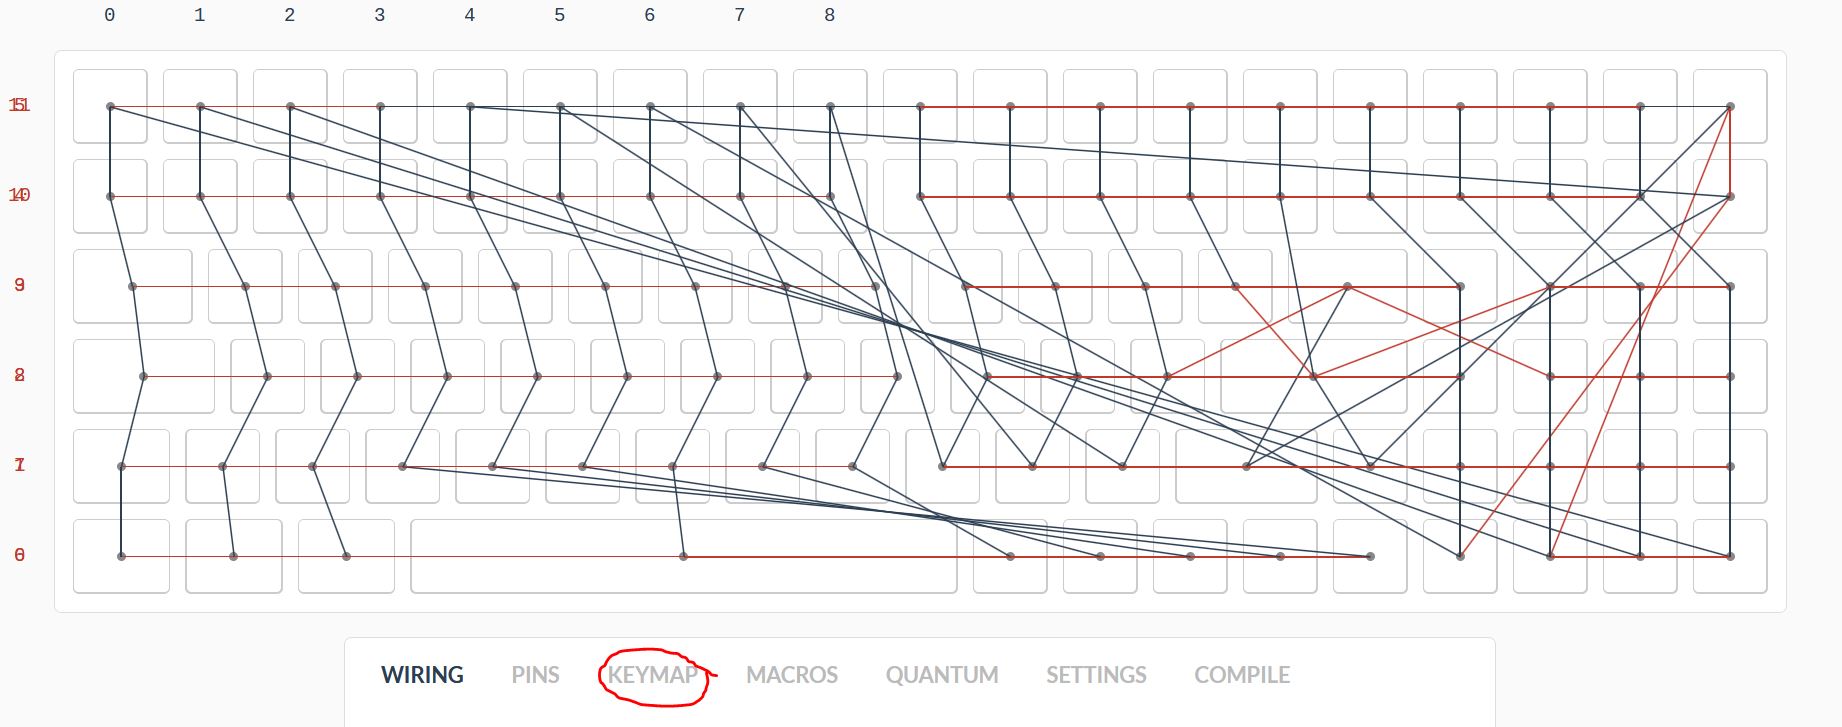
kbfirmware looks a bit scary initially.
Step two is selecting the keymap tab (circled in the picture above) to change the keymap, you can select a key (marked 1 in the picture below), then select what the keycode is sent over the usb port. You need to select the keycode (marked 2) to get the scan code picker to appear. Layers are used to send different key codes or actions when the Fn key is pressed.
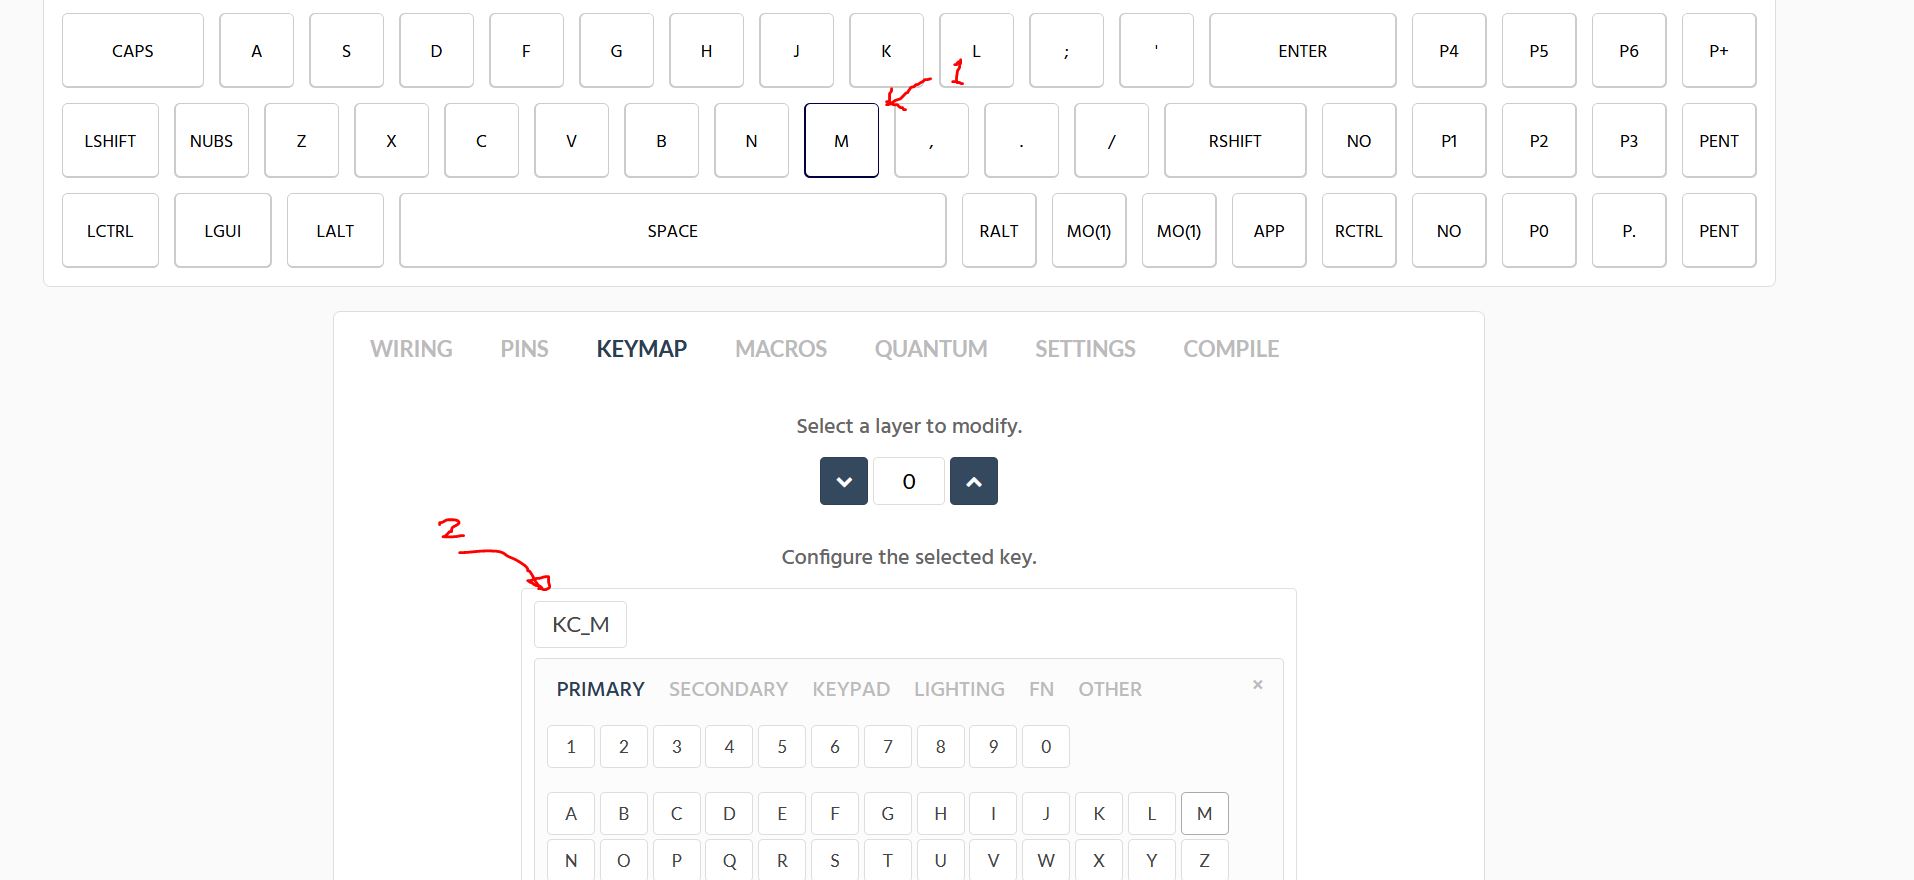
kbfirmware key mapping change.
So in my case I have made the spare key in the top right be “wake” if it’s unshifted or send a sleep code if the Fn key is pressed at the same time (to avoid accidentally pushing it)

kbfirmware key sleep.
Once you’re happy with your key mapping, step three is to go to the setting tab, change the name and save the configuration which will download the json file (in my case I’ve called it me96PI.json) to your PC. Finally the compile tab where after a short wait the hex file with the code for the keyboard can be downloaded. If you want to build your firmware manually (maybe you want to change the keyboards name in the USB packets) then you can also download the source code in a zip file.
Uploading the firmware
If you haven’t already done so so install the qmk toolbox and the associated drivers (zadig can be used instead) and start it up.
So the next step is to put our keyboard into flash mode, as per the Melody manual page there are three options listed but I went for the FN+ESC one which once pressed displays a message showing that the ATMegaU4 that powers our keyboard has been found.
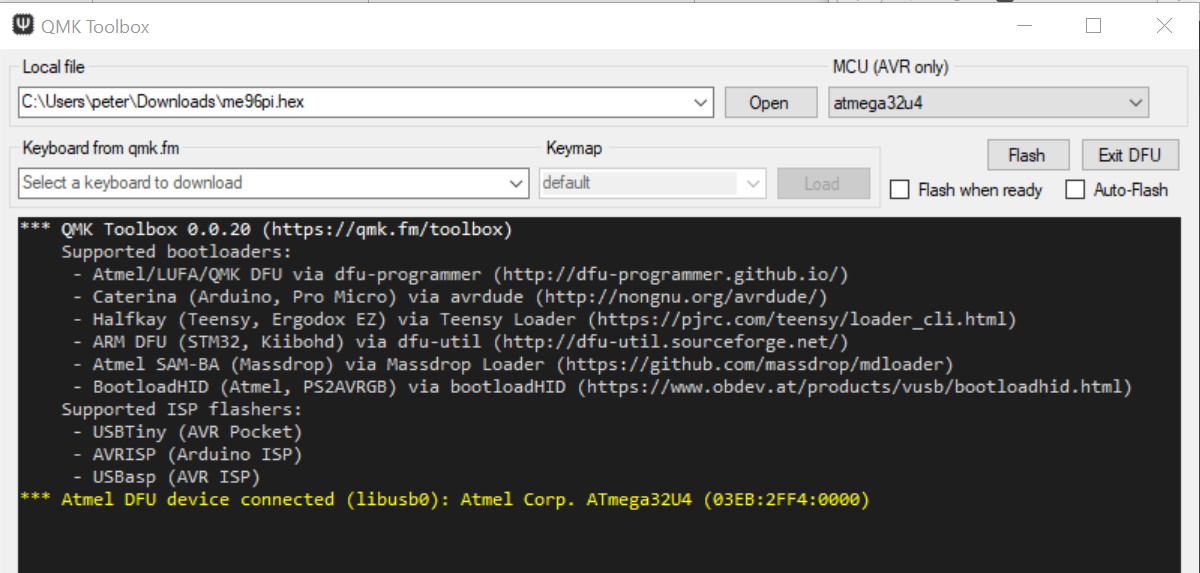
qmk message after reset.
Next press open and select the hex file we generated earlier from kbfirmware.com and then push the flash button. A few messages will appear during the upload process and eventually after the firmware has been flashed the keyboard reboots.
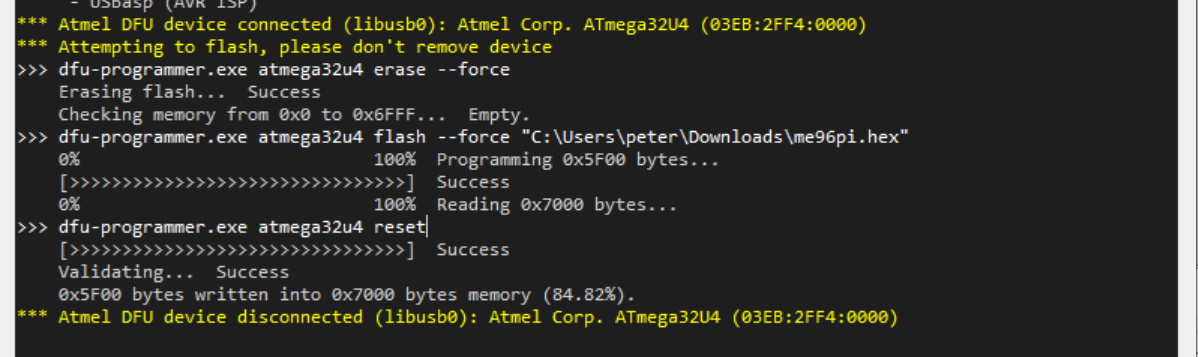
qmk messages during flashing.
Now it’s time to go back to KeyboardTester.com and check if the keys do what you want. Annoyingly for me while sleep works, wakeup doesn’t seem to work from the keyboard but that can wait for another day.